安装使用pytorch和torchvision
PyTorch 是 Python 中最流行、最易用的深度学习框架之一。它让开发者能够像操作普通 Python 代码一样,直观、灵活地设计和训练复杂的神经网络模型。其简洁的 API 设计和强大的 GPU 加速支持,使得从研究想法到实际部署的开发过程都极其高效便捷,广受开发者青睐。
NVIDIA 为 Jetson 系列设备专门适配了对应的软件包,其版本依赖关系如下:
下面教程以 JetPack6.2.1 cuda12.6 版本为例
1.安装torch工具包
1.1下载并安装torch , torchvison
wget https://pypi.jetson-ai-lab.io/jp6/cu126/+f/62a/1beee9f2f1470/torch-2.8.0-cp310-cp310-linux_aarch64.whl
wget https://pypi.jetson-ai-lab.io/jp6/cu126/+f/907/c4c1933789645/torchvision-0.23.0-cp310-cp310-linux_aarch64.whl
pip install torch-2.8.0-cp310-cp310-linux_aarch64.whl torchvision-0.23.0-cp310-cp310-linux_aarch64.whl -i https://pypi.tuna.tsinghua.edu.cn/simple
1.2 检测是否正确安装
使用python执行下面三个语句
jetson@jetson-desktop:~$ python
Python 3.10.16 (main, Dec 11 2024, 16:18:56) [GCC 11.2.0] on linux
Type "help", "copyright", "credits" or "license" for more information.
>>> import torch
>>> print(torch.__version__)
2.8.0
>>> print(torch.cuda.is_available())
True
2. 运行YOLO11
YOLO 是一种实时目标检测算法,它将目标检测视为单阶段回归问题,通过将图像划分为网格并直接预测边界框与类别概率,实现高速且高精度的检测。YOLO系列因开源易用、部署灵活,广泛应用于自动驾驶、安防监控、工业质检等领域。
2.1 安装miniconda
curl -L https://repo.anaconda.com/miniconda/Miniconda3-py310_25.3.1-1-Linux-aarch64.sh | bash
source ~/.bashrcminiconda3/bin/activate
conda --version
2.2 conda换源
conda config --add channels https://mirrors.ustc.edu.cn/anaconda/pkgs/main/
conda config --add channels https://mirrors.ustc.edu.cn/anaconda/pkgs/free/
conda config --add channels https://mirrors.ustc.edu.cn/anaconda/cloud/conda-forge/
conda config --add channels https://mirrors.ustc.edu.cn/anaconda/cloud/msys2/
conda config --set show_channel_urls yes
2.3创建conda环境
conda create -n jetson-ai python=3.102.4 进入conda环境
conda activate jetson-ai2.5 安装torch和torchvison
wget https://pypi.jetson-ai-lab.io/jp6/cu126/+f/62a/1beee9f2f1470/torch-2.8.0-cp310-cp310-linux_aarch64.whl
wget https://pypi.jetson-ai-lab.io/jp6/cu126/+f/907/c4c1933789645/torchvision-0.23.0-cp310-cp310-linux_aarch64.whl
pip install torch-2.8.0-cp310-cp310-linux_aarch64.whl torchvision-0.23.0-cp310-cp310-linux_aarch64.whl -i https://pypi.tuna.tsinghua.edu.cn/simple
2.6 安装ultralytics
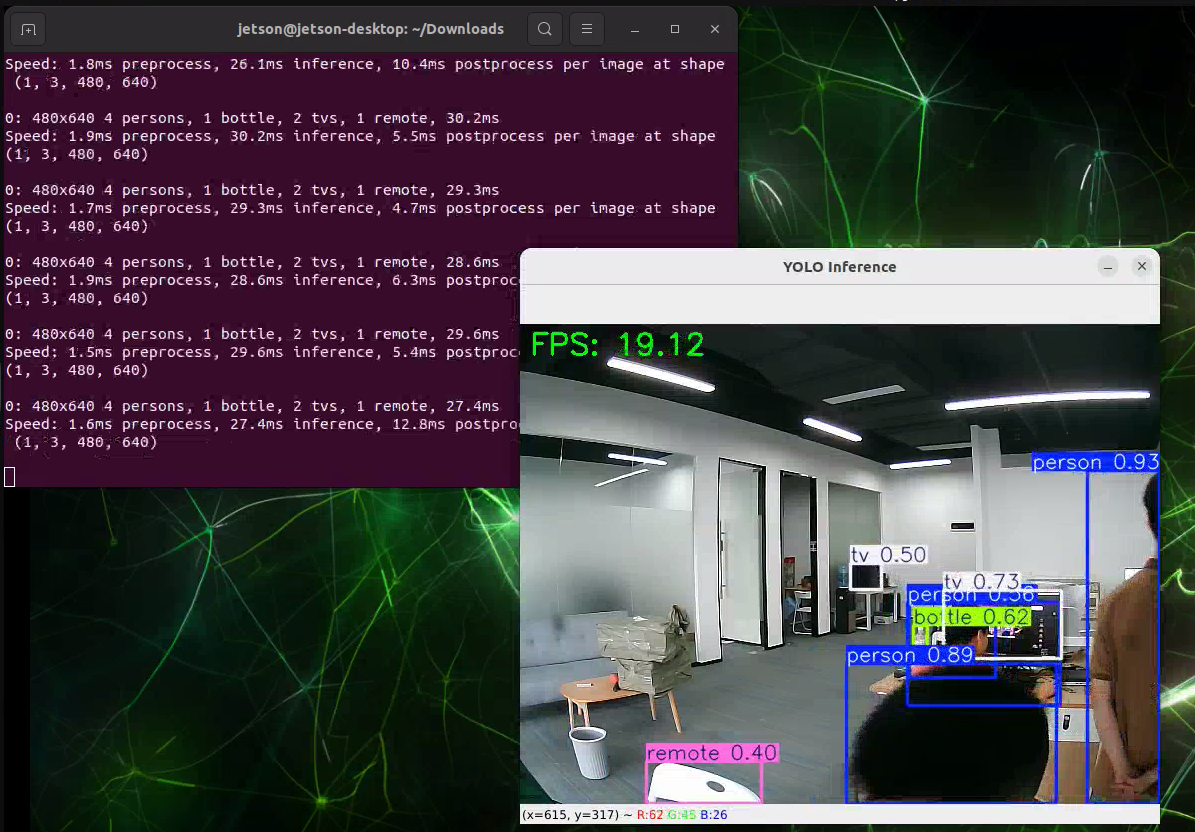
pip install ultralytics -i https://pypi.tuna.tsinghua.edu.cn/simple2.7 运行摄像头视频推理例程
接入摄像头,并在上面创建的环境中运行如下程序。
import cv2
import time
from ultralytics import YOLO
from ultralytics import YOLOWorld

# Load the YOLO model
model = YOLO("yolo11s.pt")

# Open the video file
video_path = 0
cap = cv2.VideoCapture(video_path)

# Loop through the video frames
while cap.isOpened():

    # Read a frame from the video
    success, frame = cap.read()
    start = time.time()
    if success:
        # Run YOLO inference on the frame
        results = model(frame)
        inf_time = time.time() - start
        # Visualize the results on the frame
        annotated_frame = results[0].plot()
        fps = 1.0 / inf_time if inf_time > 0 else 0
        # show FPS
        cv2.putText(annotated_frame, f"FPS: {fps:.2f}", (10, 30), cv2.FONT_HERSHEY_SIMPLEX, 1, (0,255,0), 2)
        cv2.imshow("YOLO Inference", annotated_frame)

        # Break the loop if 'q' is pressed
        if cv2.waitKey(1) & 0xFF == ord("q"):
            break
    else:
        # Break the loop if the end of the video is reached
        break

# Release the video capture object and close the display window
cap.release()
cv2.destroyAllWindows()