Flash the C1901
We recommend flashing from Linux or a Linux VM. See Install a VMware VM for instructions on installing the VM and SDK Manager.
1. Flash with NVIDIA SDK Manager
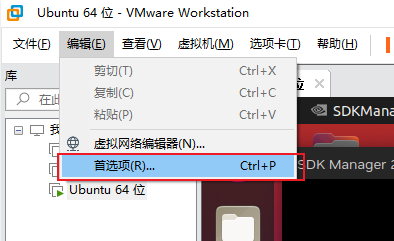
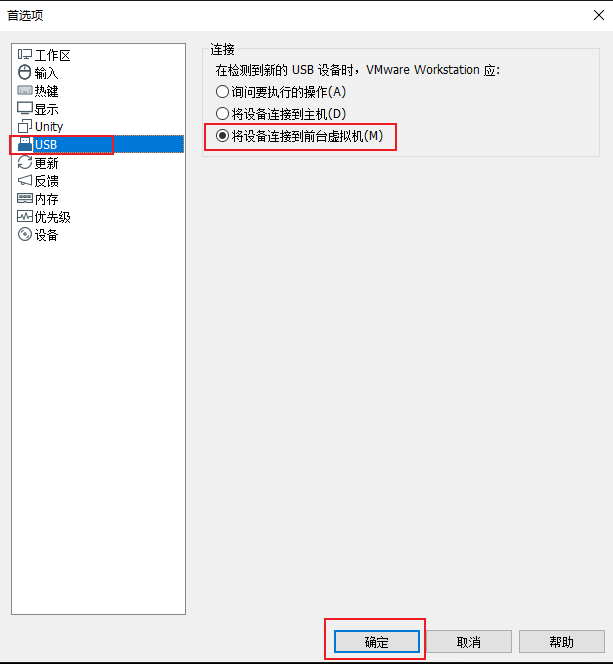
1.1 Configure the VMware USB Mode
Set the USB connection mode to "Connect the device to the foreground virtual machine" to prevent the flash from failing when the board reboots during the process.
1.2 Enter Recovery Mode
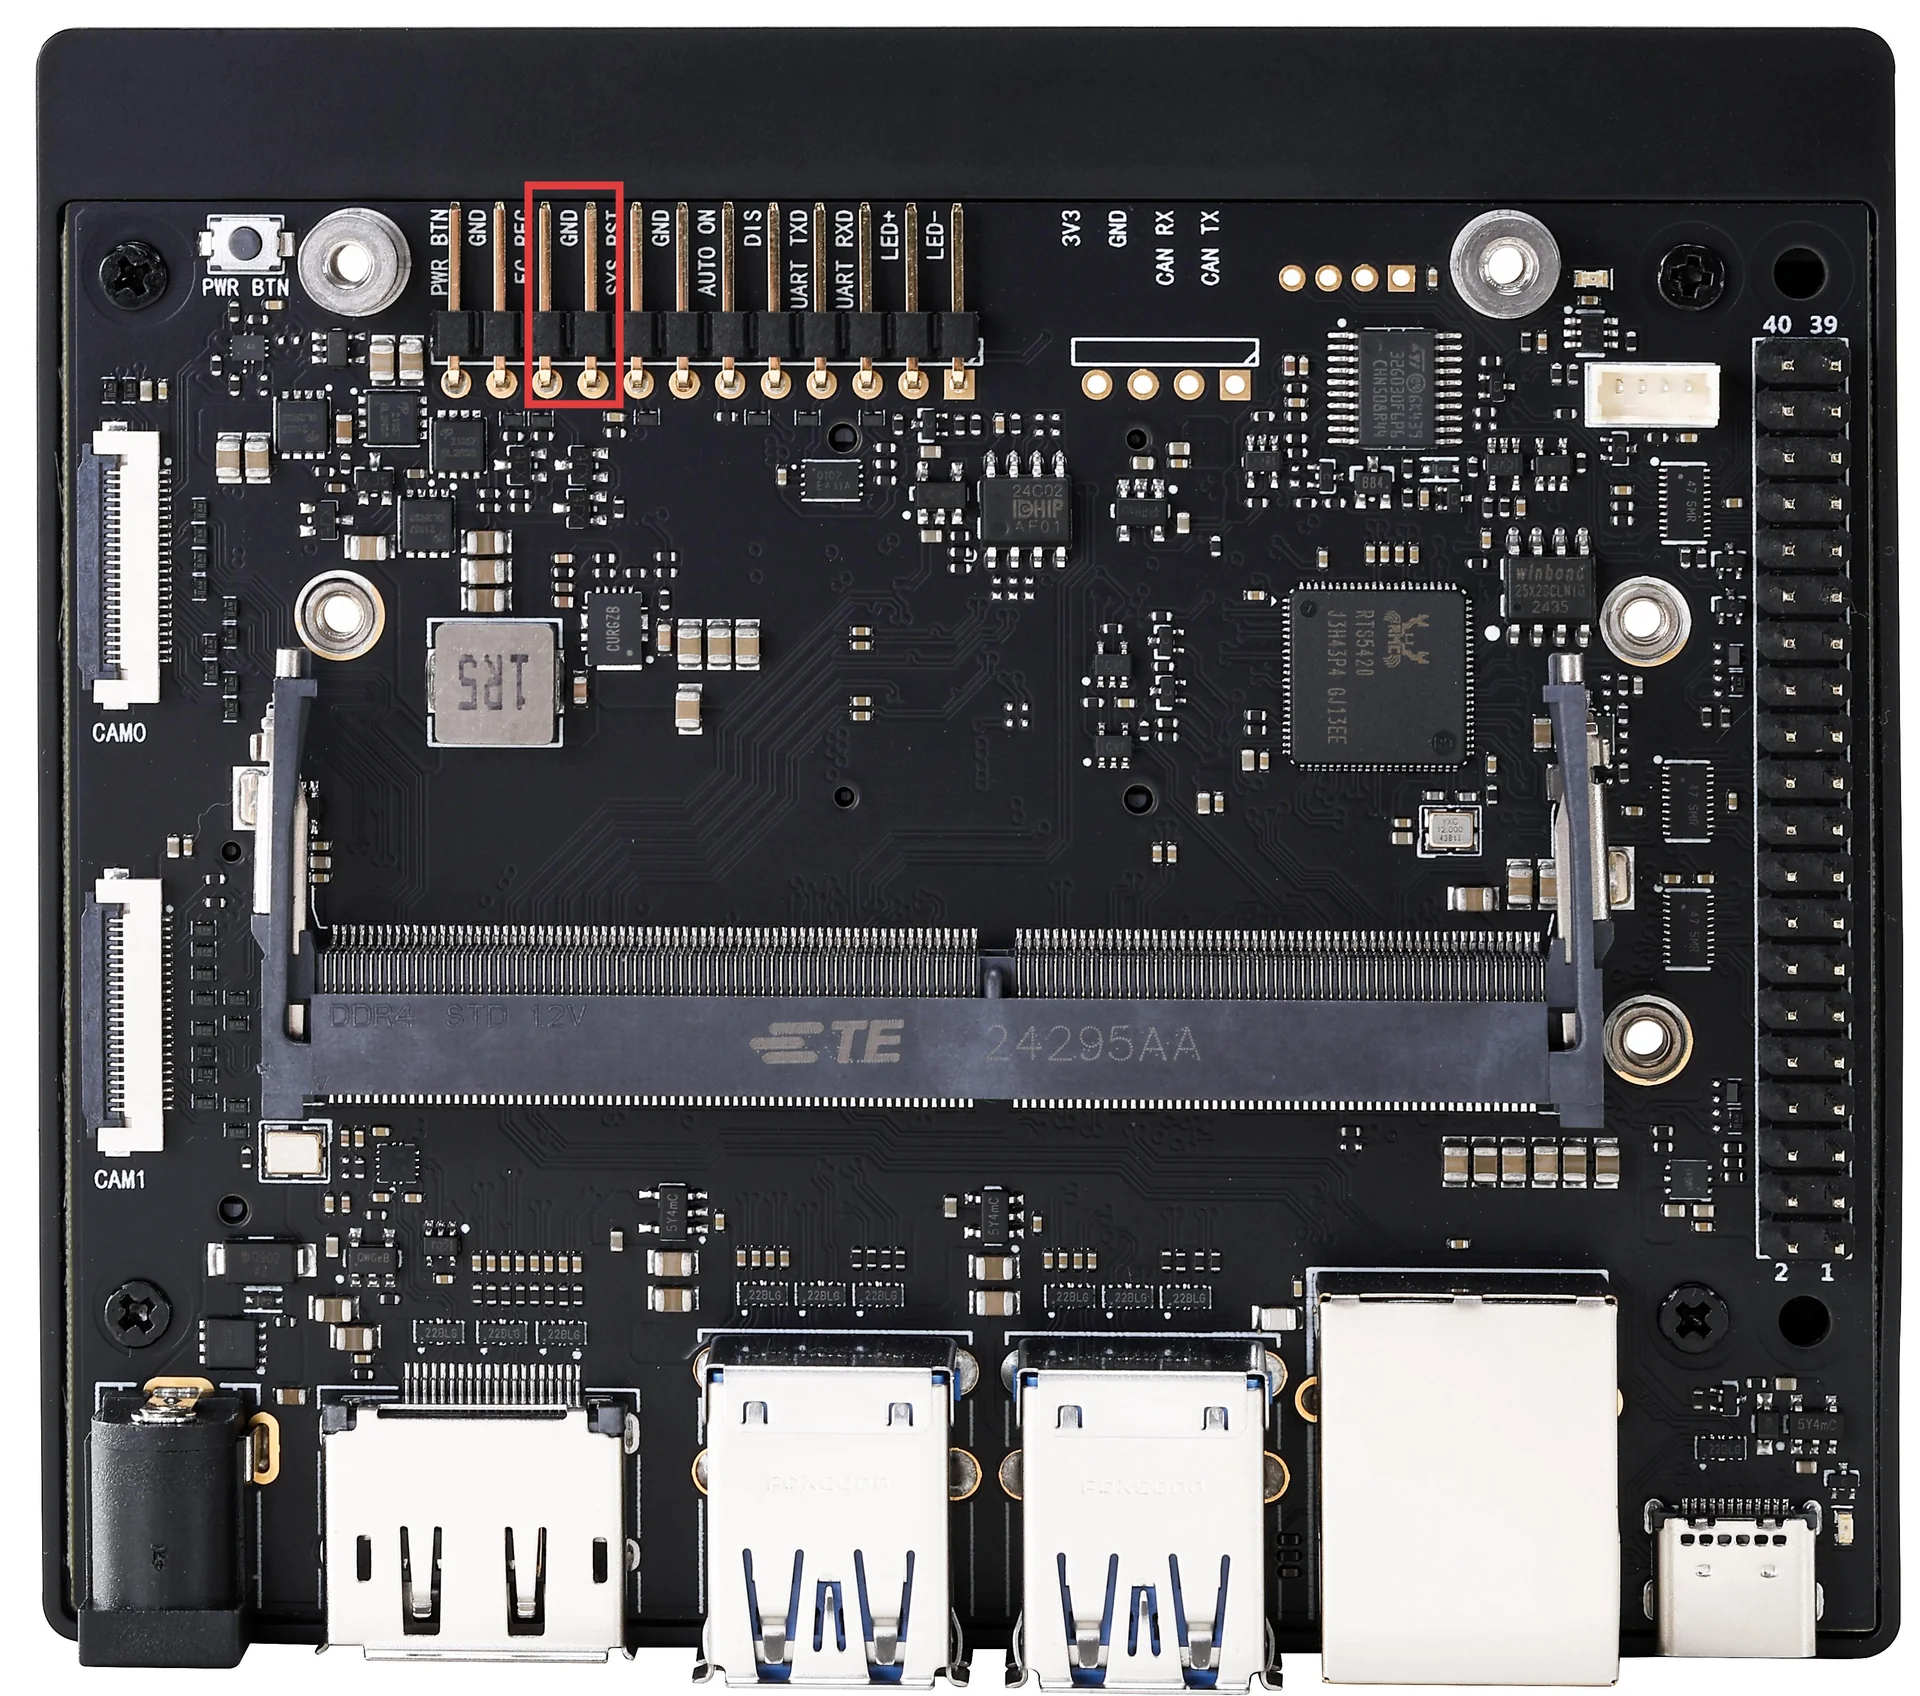
- Short the board's FC REC and GND pins with a jumper cap
- Connect the board to the computer with a USB-to-Type-C data cable
- Connect DC power to the board
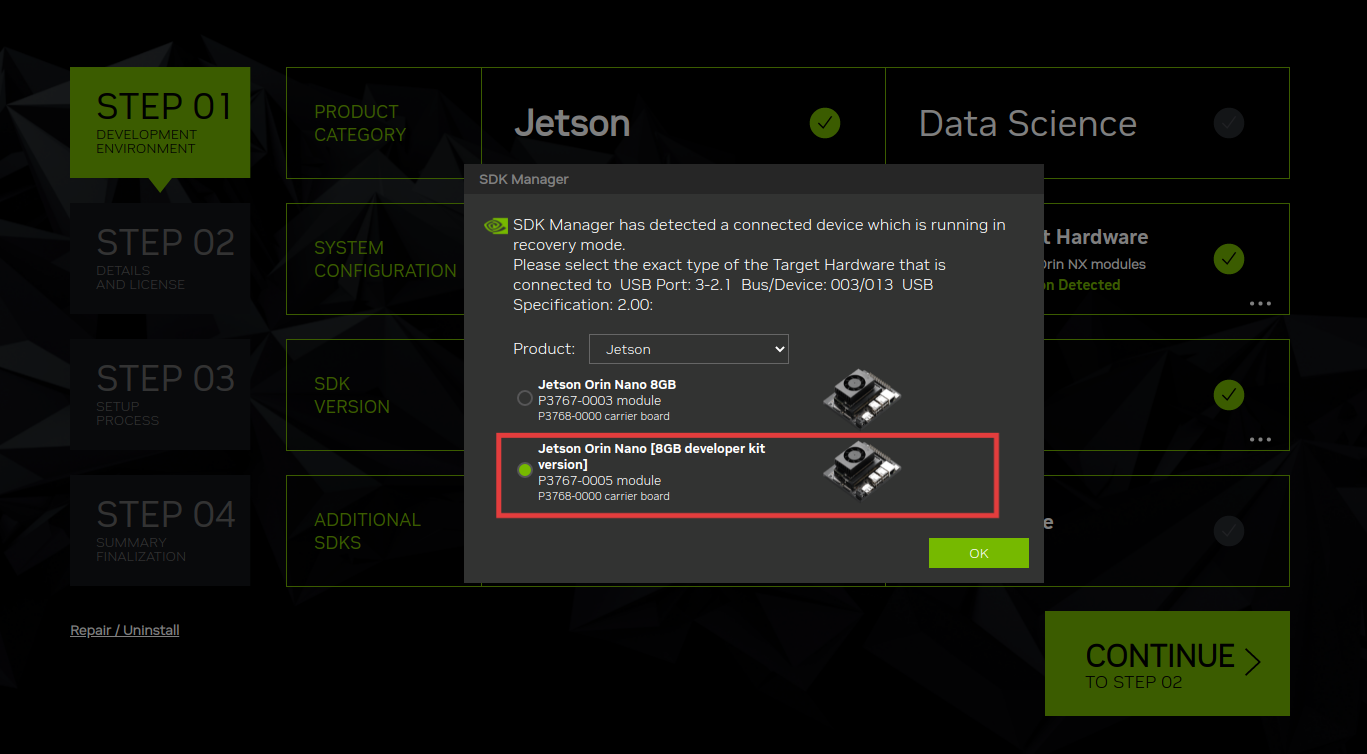
- After recovery mode is entered, SDK Manager detects the module type automatically and the heatsink fan does not run
If no action is taken for a while after entering recovery mode, the board reboots into the system. Be mindful of the timing.
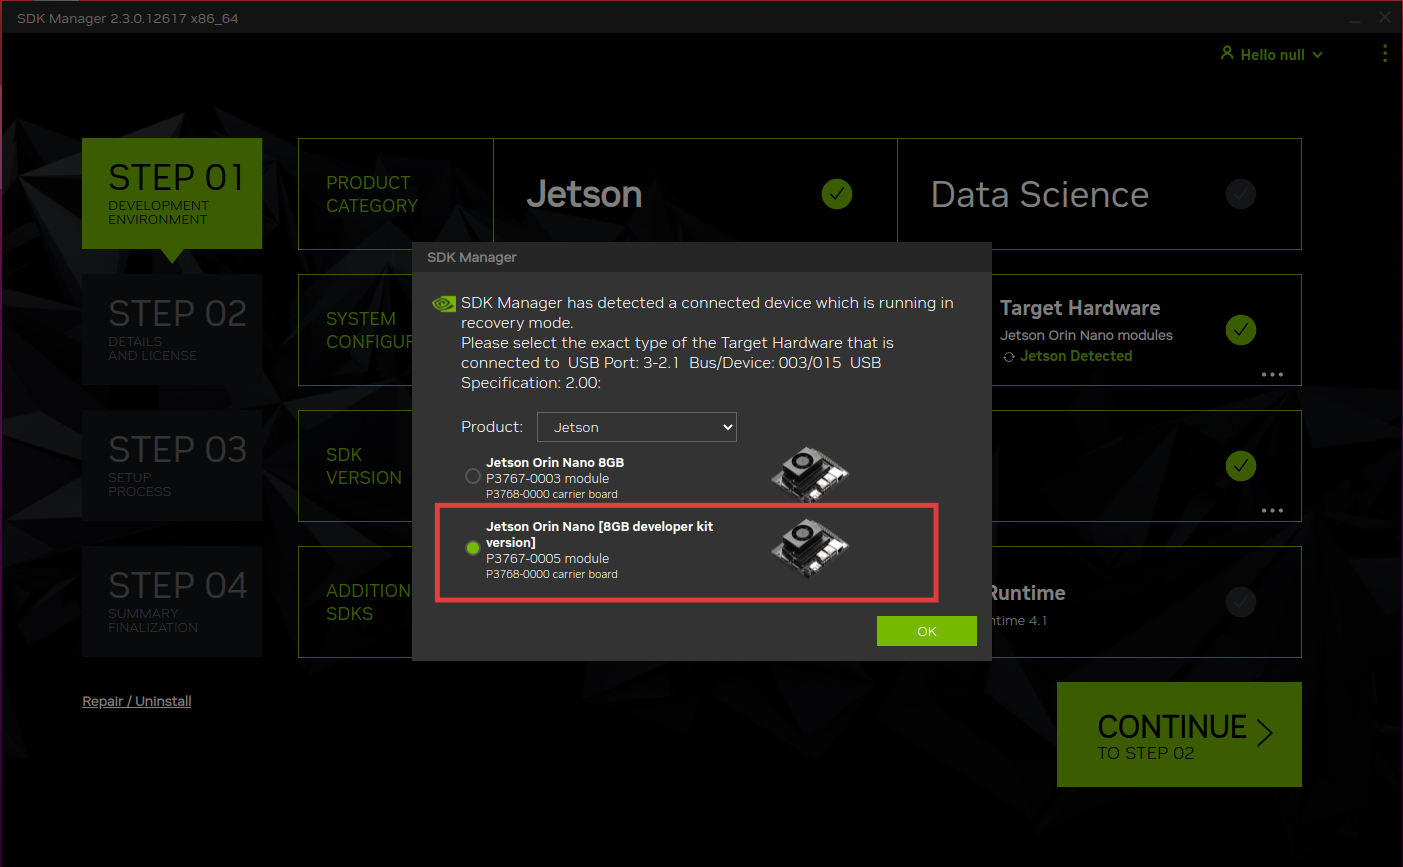
1.3 Configure the SDK
- Uncheck Host Machine, then click CONTINUE
- Select only Jetson Linux
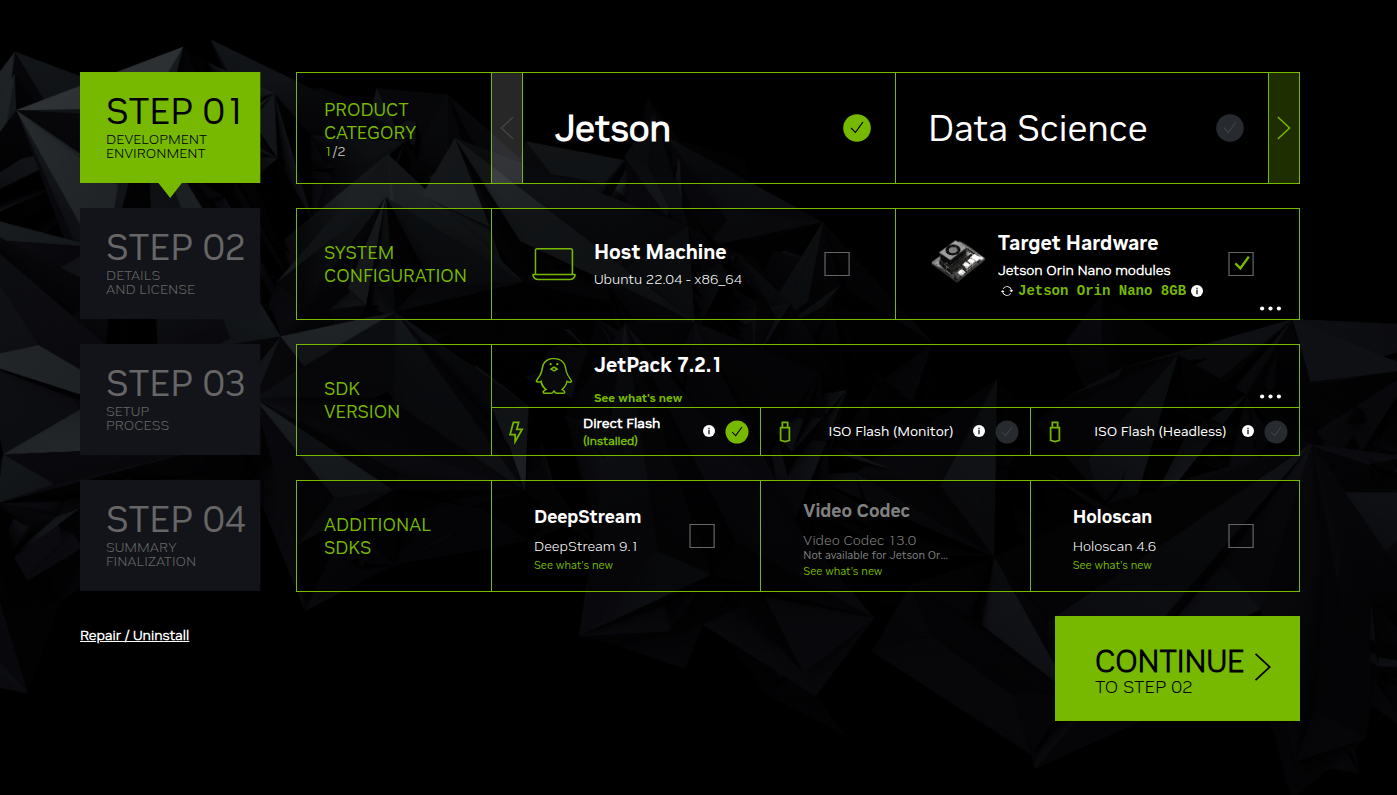
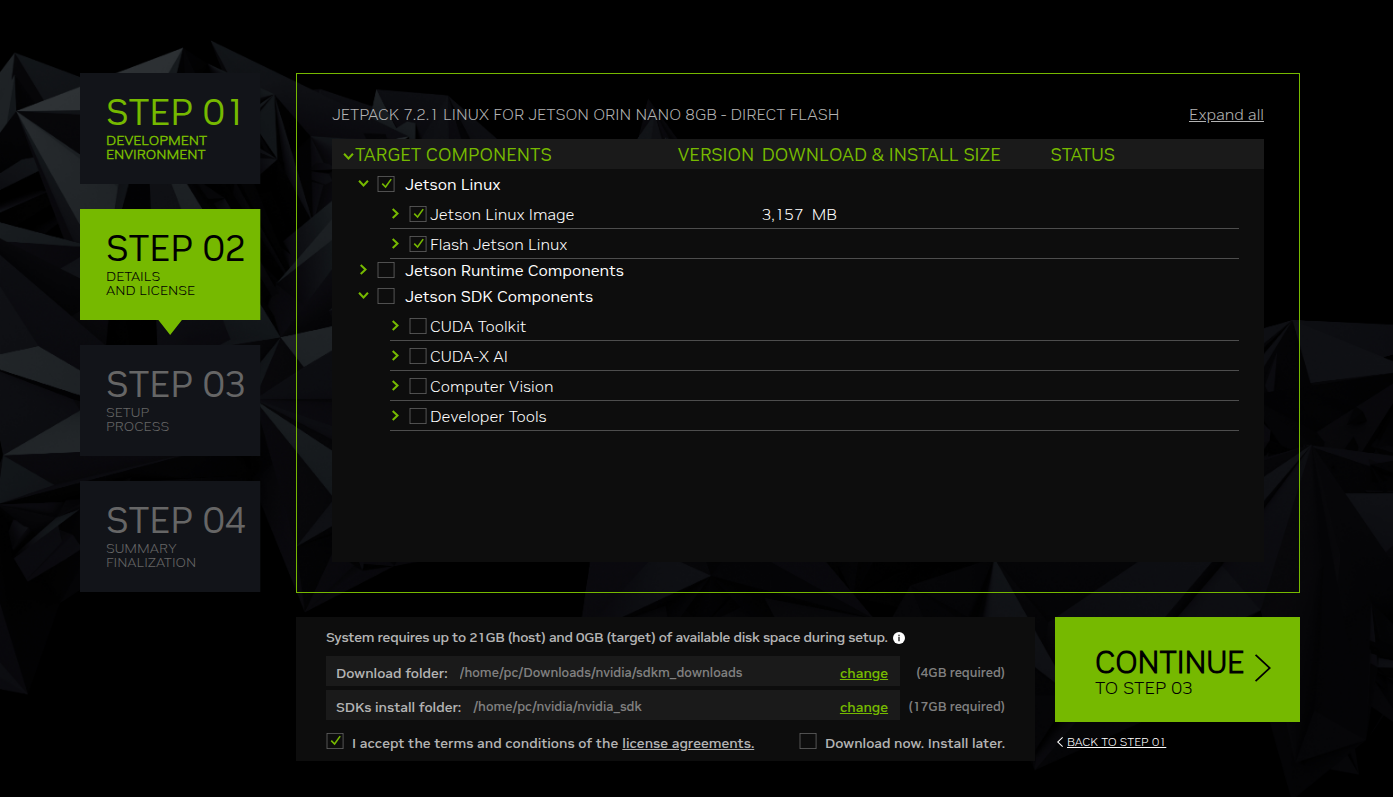
1.4 Wait for the Download to Complete
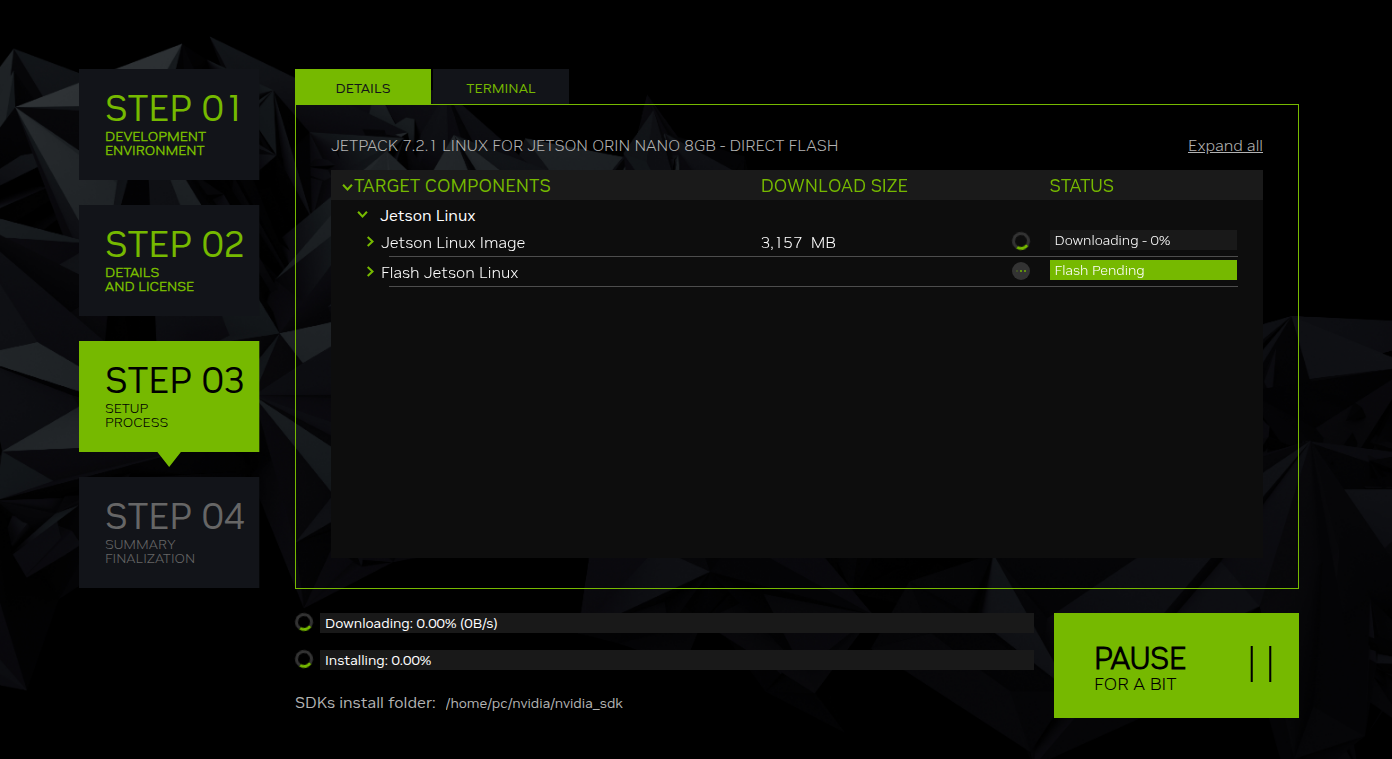
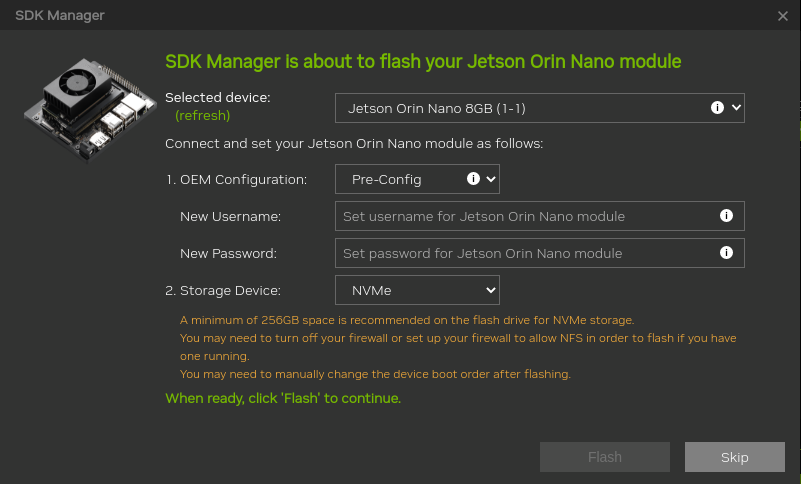
1.5 Configure the Flash Parameters
- Pre-Config: Set the username and password in advance
- Runtime: Configure the username and password after first boot
- Storage Device: Select the target medium (microSD card / SSD / USB drive)
- Select Developer Kit Version
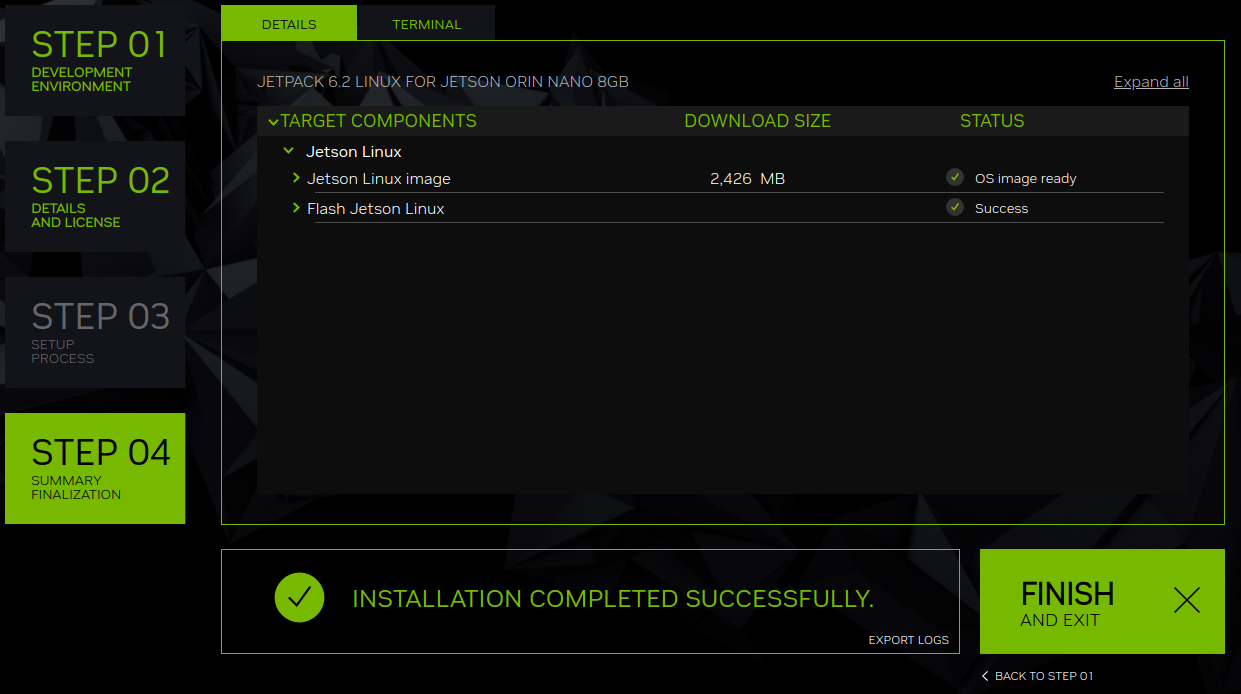
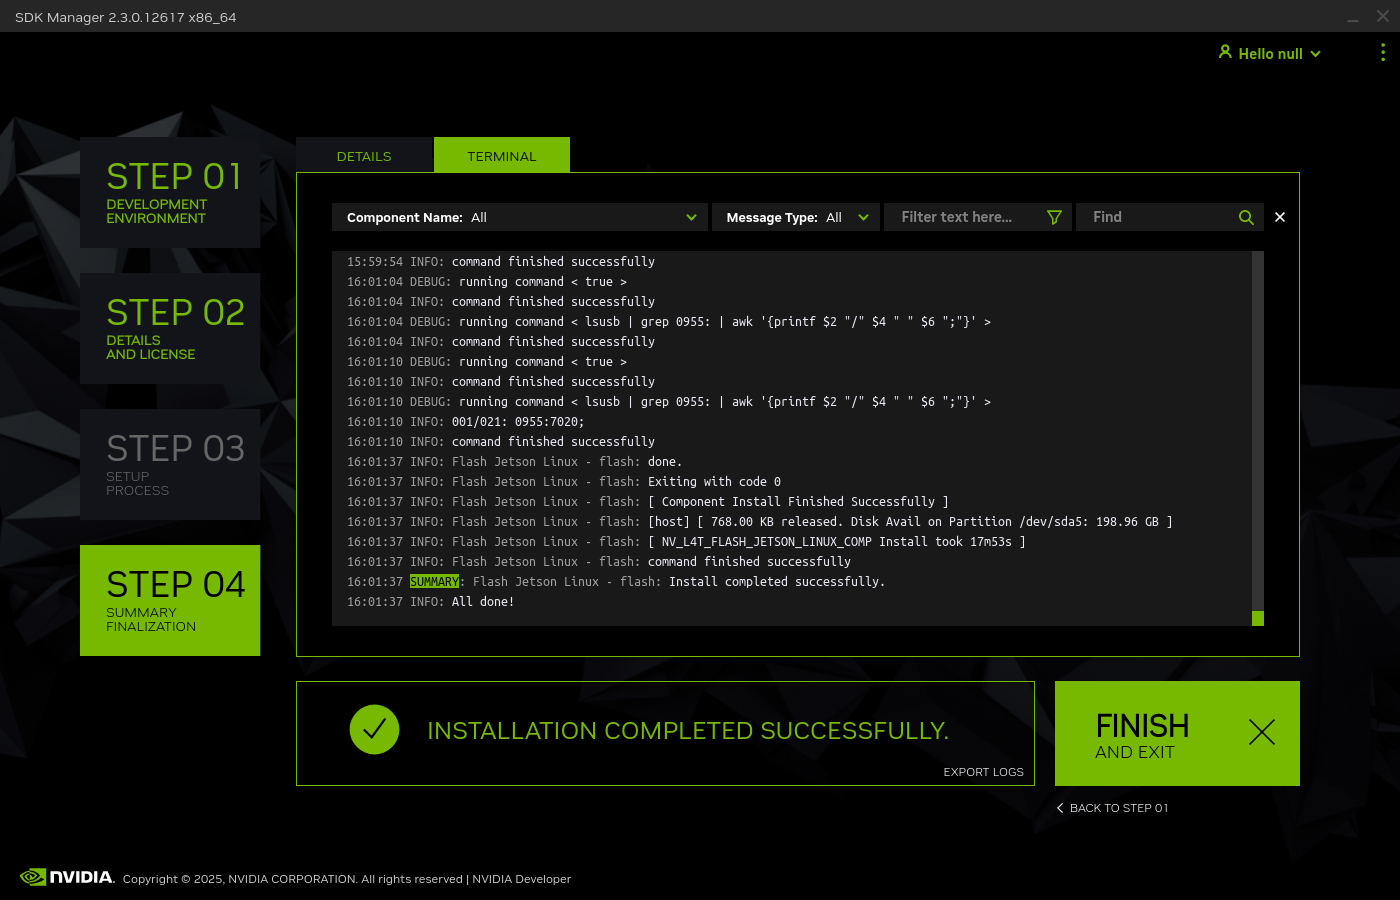
Wait patiently for the flash to finish; it takes about 10–20 minutes. The board may reconnect to the host several times. Do not disconnect the data cable or power off the board. You can remove the jumper cap after the board type has been detected.
After flashing, remove the jumper cap and power on the board. The flash was successful if it boots into the desktop or initial setup screen.
2. Flash SUPER Firmware from the Command Line
This operation requires the official firmware environment. First complete at least one full flash with SDK Manager to create the firmware cache.
2.1 Enter Recovery Mode
Short FC REC and GND with a jumper cap, connect the board to the computer with a Type-C data cable, and connect board power.
2.2 Flash with the Official Firmware
Close SDK Manager before proceeding. Flashing takes about 10–20 minutes.
Command for JetPack 6/7:
The command parameters are identical; only the firmware directory differs. Use
JetPack_6.2.1_Linux_...for JetPack 6.2.1 andJetPack_7.2_Linux_...for JetPack 7.2. The following example uses JetPack 7.2.
cd /home/ubuntu/nvidia/nvidia_sdk/JetPack_7.2_Linux_JETSON_ORIN_NANO_TARGETS/Linux_for_Tegra
sudo ./tools/kernel_flash/l4t_initrd_flash.sh --external-device nvme0n1p1 \
  -c tools/kernel_flash/flash_l4t_t234_nvme.xml -p "-c bootloader/generic/cfg/flash_t234_qspi.xml" \
  --showlogs --network usb0 jetson-orin-nano-devkit-super internal
Command for JetPack 5.1.5:
cd /home/ubuntu/nvidia/nvidia_sdk/JetPack_5.1.5_Linux_JETSON_ORIN_NANO_TARGETS/Linux_for_Tegra
sudo ./tools/kernel_flash/l4t_initrd_flash.sh --external-device nvme0n1p1 \
  -c tools/kernel_flash/flash_l4t_external.xml -p "-c bootloader/t186ref/cfg/flash_t234_qspi.xml" \
  --showlogs --network usb0 jetson-orin-nano-devkit-super internal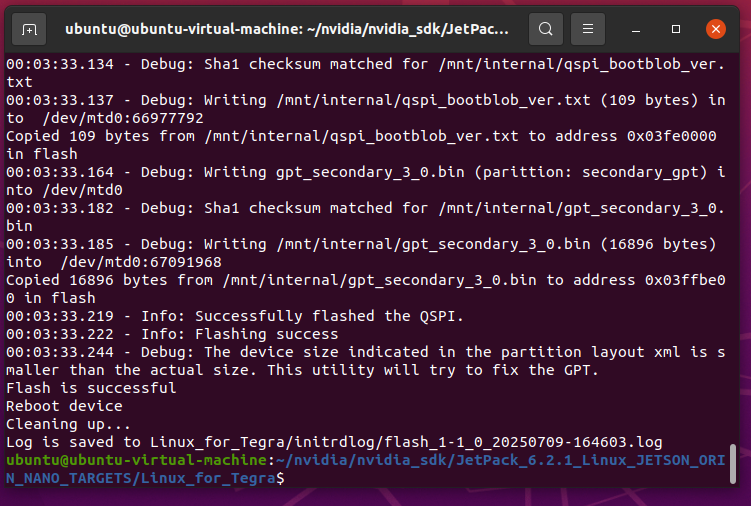
2.3 Verify SUPER Mode
After powering on the board and completing user setup, select a power mode from the upper-right corner of the desktop. 25W & MAXN SUPER is available only in SUPER mode; standard mode provides only 7W and 15W.
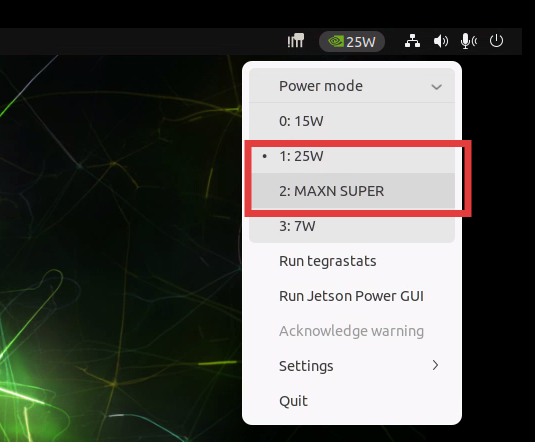
If 25W and MAXN SUPER appear in the power-mode list, the SUPER firmware is active. If only 7W and 15W are available, confirm that the flash command uses the jetson-orin-nano-devkit-super configuration, perform a complete reflash, and check again after rebooting.
3. Back Up and Restore Existing Firmware
3.1 Back Up the Firmware
Short FC REC and GND with a jumper cap, connect the board to the computer over Type-C, and connect power to enter recovery mode.
Alternatively, while the board is running normally and connected to the host, run:
sudo reboot -f forced-recoveryEnter the command-line directory in the firmware cache used for the original flash:
cd /home/ubuntu/nvidia/nvidia_sdk/JetPack_7.2_Linux_JETSON_ORIN_NANO_TARGETS/Linux_for_TegraInstall the dependencies:
sudo apt-get install qemu-user-static libxml2-utils abootimg sshpass nfs-kernel-server binutilsBackup command:
sudo ./tools/backup_restore/l4t_backup_restore.sh -b -e nvme0n1 jetson-orin-nano-devkit-nvmeRestore command:
sudo ./tools/backup_restore/l4t_backup_restore.sh -r -e nvme0n1 jetson-orin-nano-devkit-nvmeWhen restoring a backup on a third-party carrier board, edit
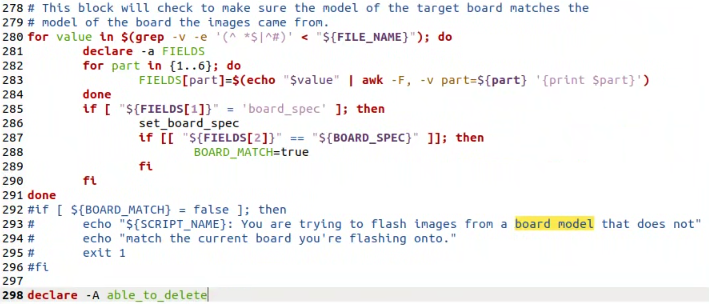
nvrestore_partitions.shand comment out lines 292–296.