
40-pin Expansion Header Configuration (Jetson-IO)
On Jetson Orin Nano / NX, most pins of the 40-pin expansion header can work either as general-purpose GPIO or as SFIO (special-function I/O such as I2C / SPI / UART / PWM / I2S).
The pin configuration (pinmux) is statically written when the device is flashed. Changing it directly requires editing the official pinmux spreadsheet and reflashing — fine for production, but inconvenient during development. NVIDIA therefore provides the Jetson Expansion Header Tool (Jetson-IO): a Python tool running on the device that changes pin configurations through a menu UI. It works by generating a new device tree blob (DTB / DTBO) that takes effect after reboot.
Default Pin Functions
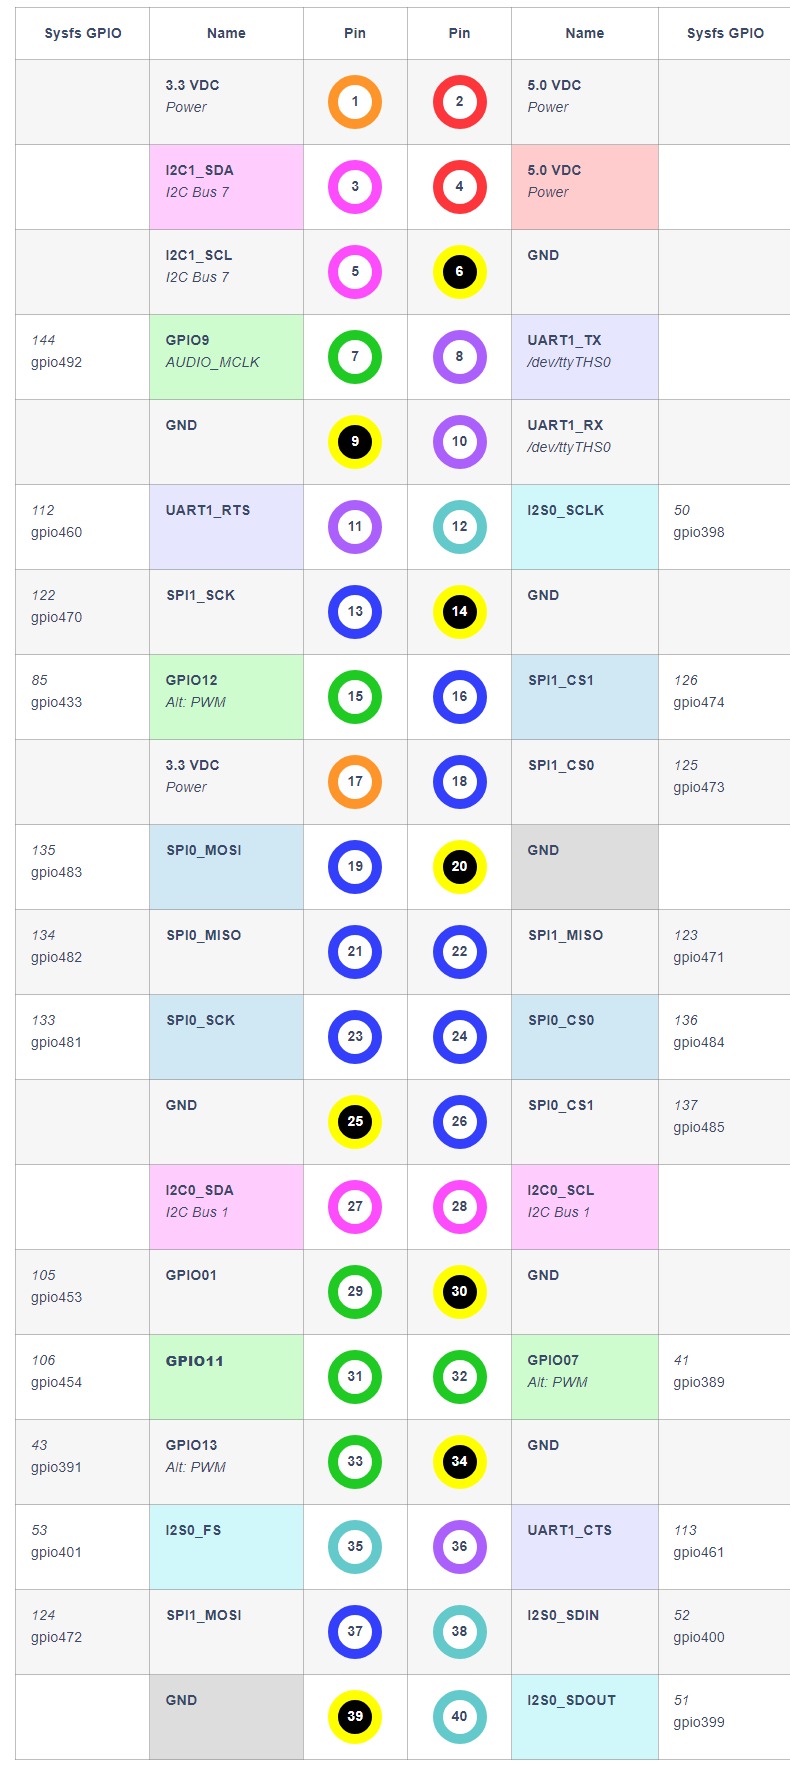
Pins used by each function in the default configuration (physical pin numbers):
| Function | Pins |
|---|---|
| I2C1 | 3 (SDA) / 5 (SCL) |
| I2C2 | 27 (SDA) / 28 (SCL) |
| UART1 | 8 (TX) / 10 (RX) |
| SPI1 | 19 (MOSI) / 21 (MISO) / 23 (SCK) / 24 (CS0) / 26 (CS1) |
| I2S | 12 / 35 / 38 / 40 |
| PWM | 32 / 33 |
| Others | GPIO by default |
Whether a given pin is currently GPIO or SFIO should be confirmed with
config-by-pin.py, described below.
Menu UI: jetson-io.py
Run on the device:
sudo /opt/nvidia/jetson-io/jetson-io.py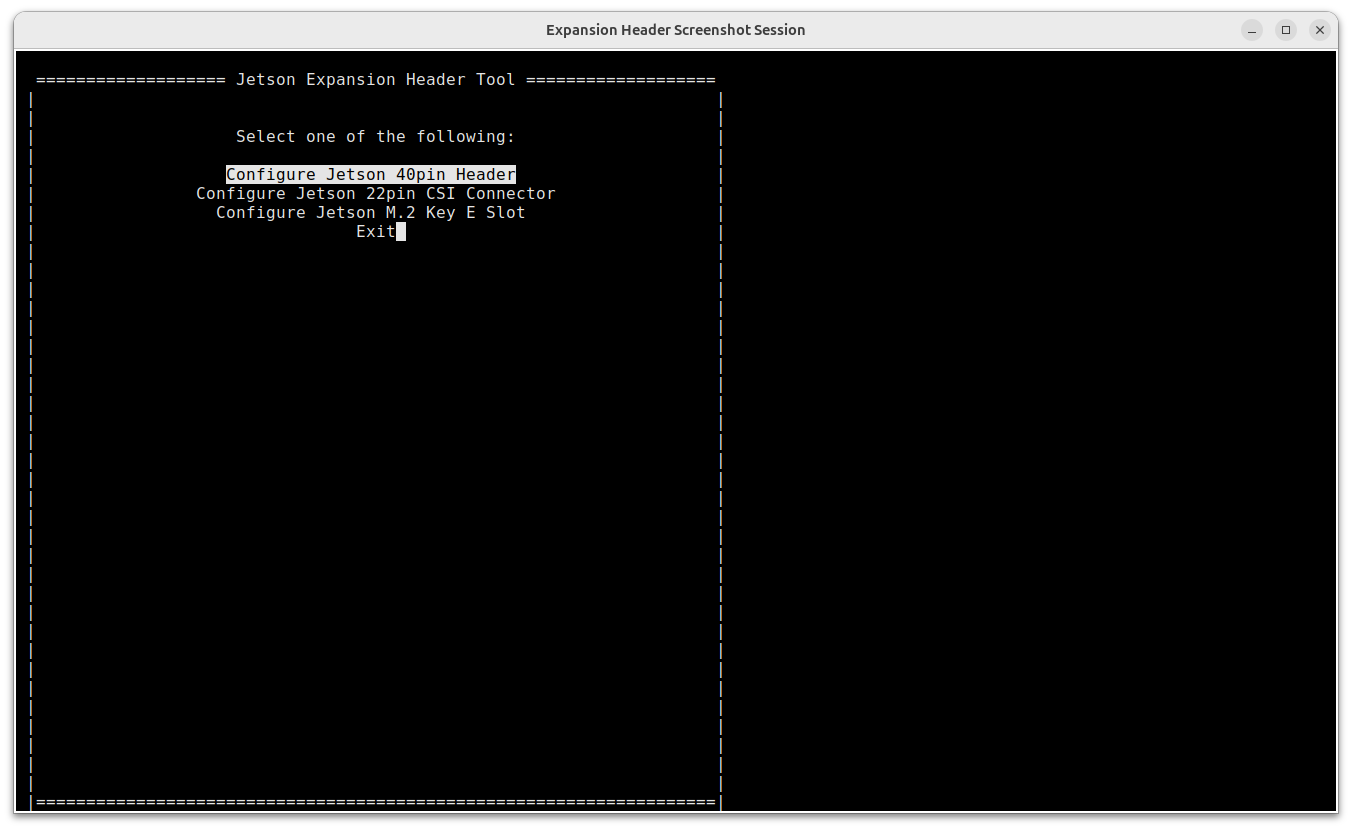
The following UI and command screenshots were captured on a Jetson Orin Nano Super running JetPack 7.2.1 (L4T R39.2.1). Menu labels may differ slightly between JetPack releases, but the workflow is the same.
Main Screen (Selecting a Header)
The main screen lists the expansion headers supported on your device (40-pin Header, CSI connector, M.2 Key E, etc.). Select Configure 40-pin Header to enter the header screen.
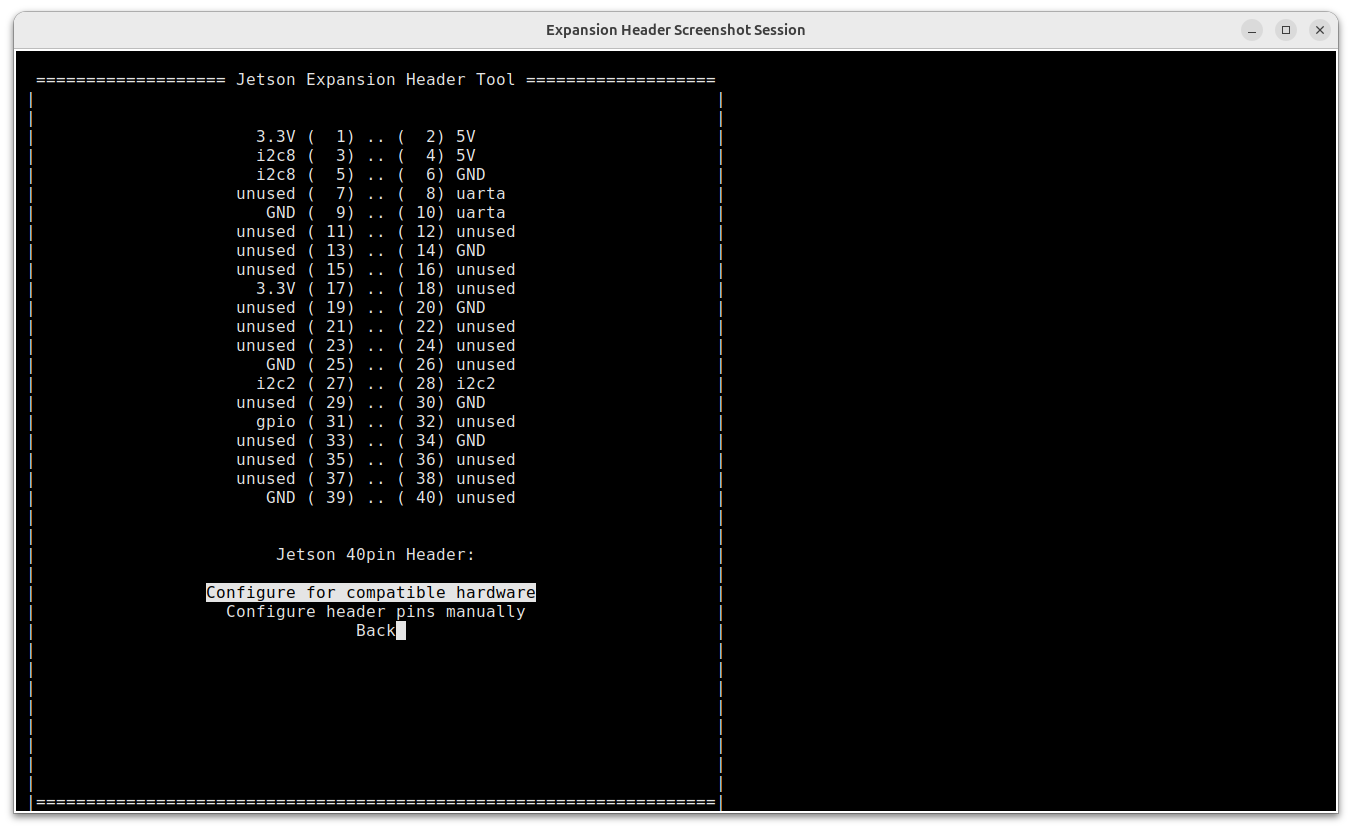
Header Screen
The header screen shows the current configuration and offers two options:
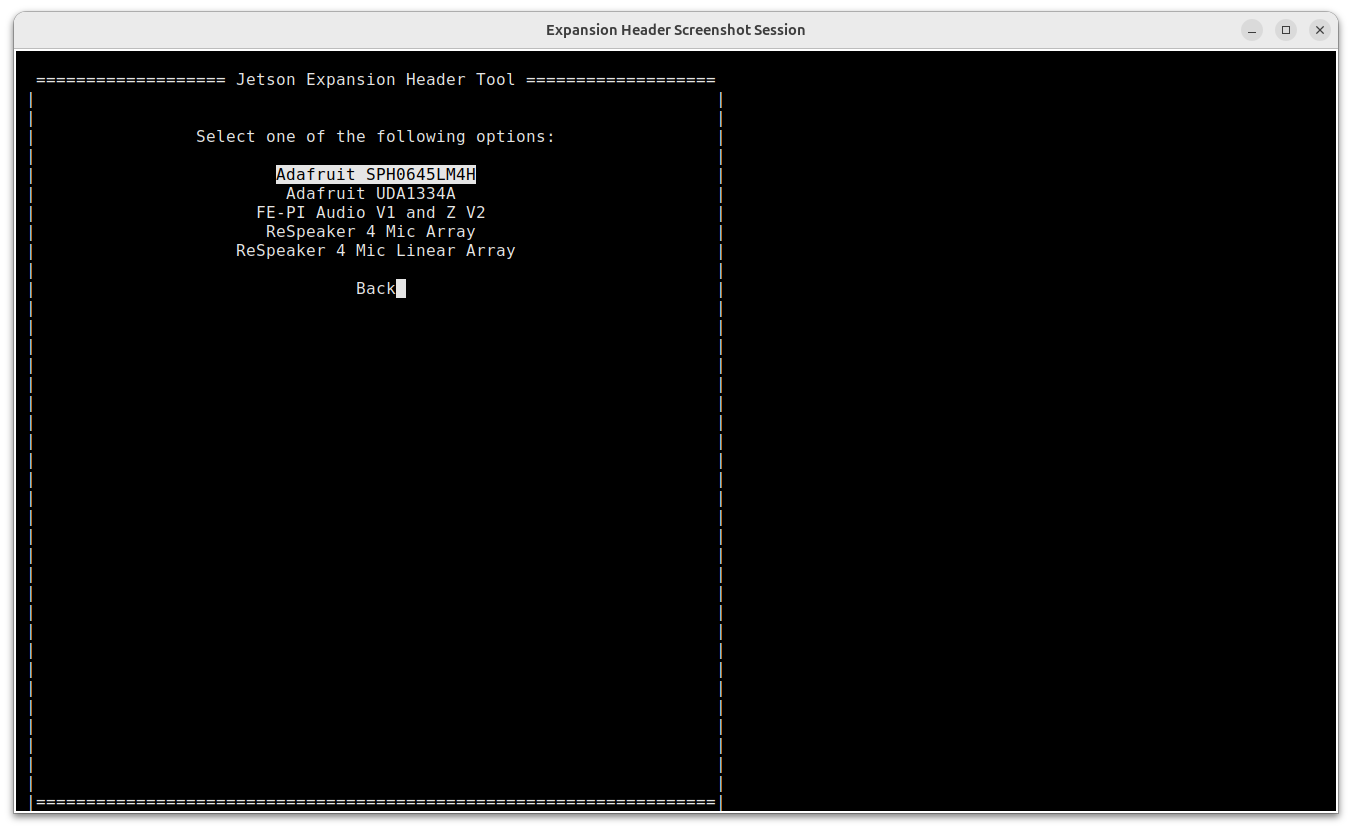
- Configure for compatible hardware: pick from NVIDIA's preset configurations for hardware modules (e.g. certain audio HATs); the required functions are enabled automatically.
- Configure header pins manually: choose exactly which functions to enable (the most common path).
Configuring Pins Manually
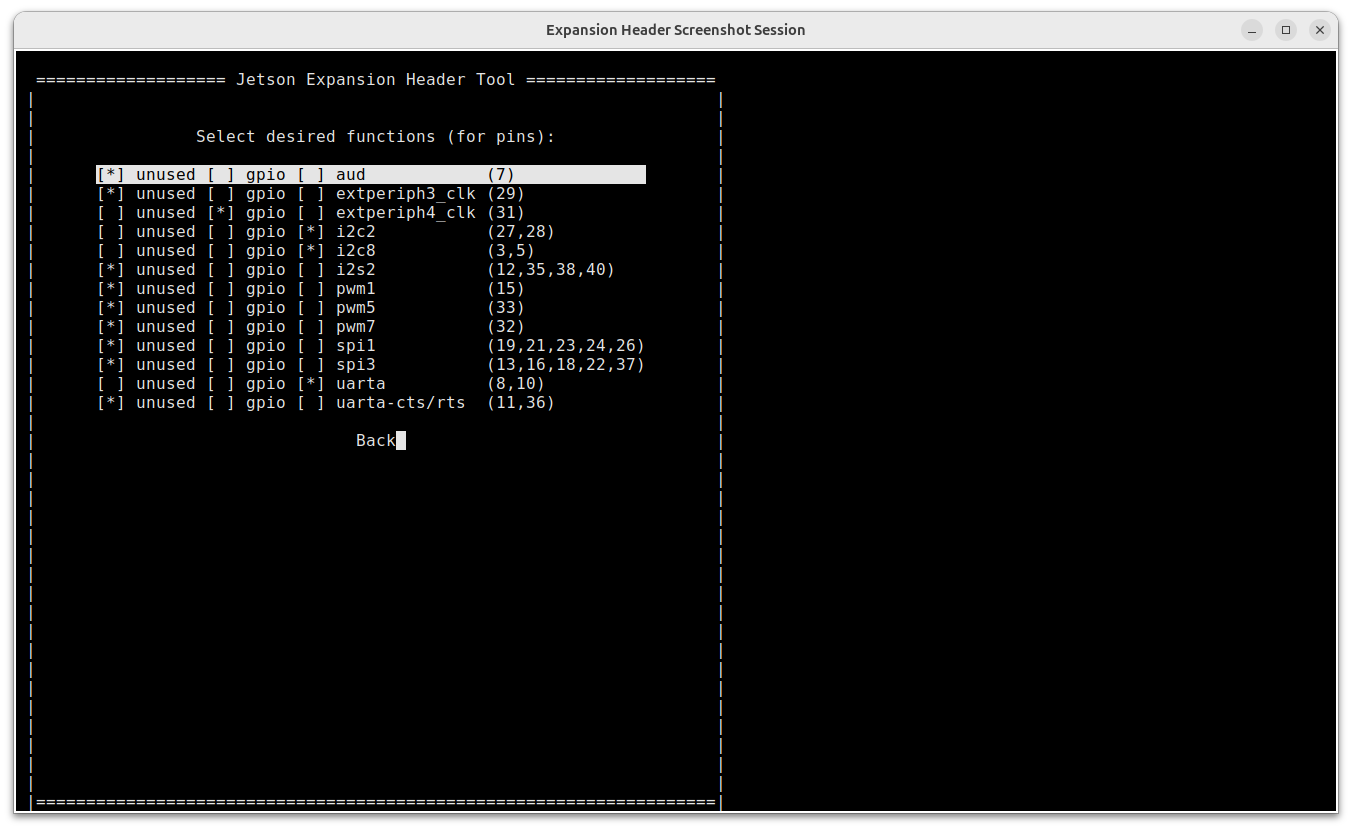
The manual configuration screen lists all special functions the header supports, with the associated pins in parentheses:
- Move with the ↑ / ↓ arrow keys and press Enter or Space to toggle a function. Pins of disabled functions are available as GPIO.
- When done, select Back, then Save pin changes.
- You can also select Export as Device-Tree Overlay to export the configuration as a DTBO file (saved in
/boot/, reusable for production or custom images).
Saving and Applying
Back on the main screen:
- Save and reboot to reconfigure pins: builds a new DTB, updates
/boot/extlinux/extlinux.conf, and reboots immediately. - Save and exit without rebooting: writes the configuration only; it takes effect on your next reboot.
- Discard all pin changes: abandons all modifications.
Multiple configurations coexist
Jetson-IO preserves every saved configuration, not just the latest. Once you have saved more than one, a boot menu appears at every startup letting you pick any saved configuration.
Command-Line Tools
If you prefer not to use the menus, three equivalent CLI utilities are provided (sudo required).
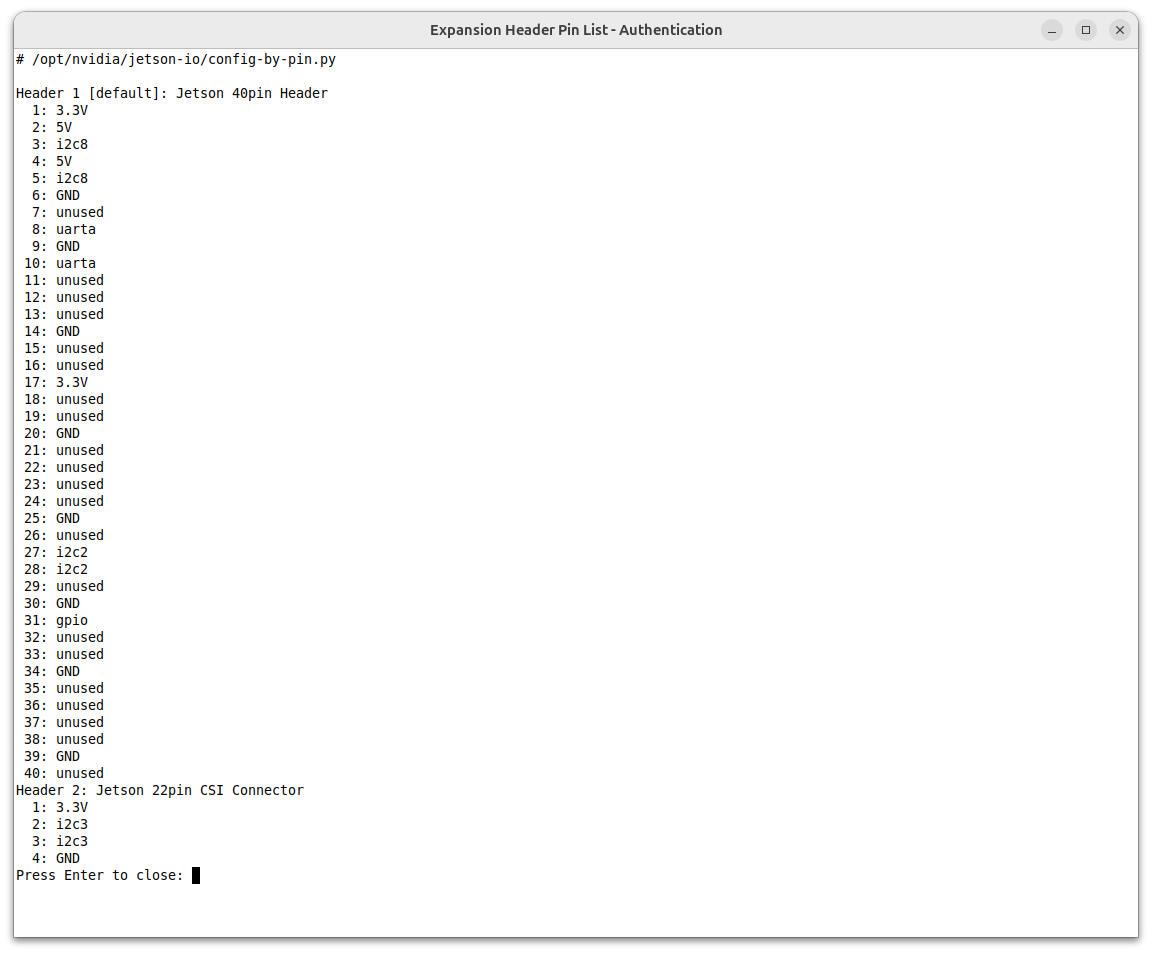
Query the current configuration: config-by-pin.py
# List supported headers and their header numbers
sudo /opt/nvidia/jetson-io/config-by-pin.py -l

# Show the pin-by-pin configuration of the 40-pin header (header 1 by default)
sudo /opt/nvidia/jetson-io/config-by-pin.py

# Show a single pin (e.g. pin 7)
sudo /opt/nvidia/jetson-io/config-by-pin.py -p 7
Example pin-by-pin output:
Example single-pin query:

Configure by function: config-by-function.py
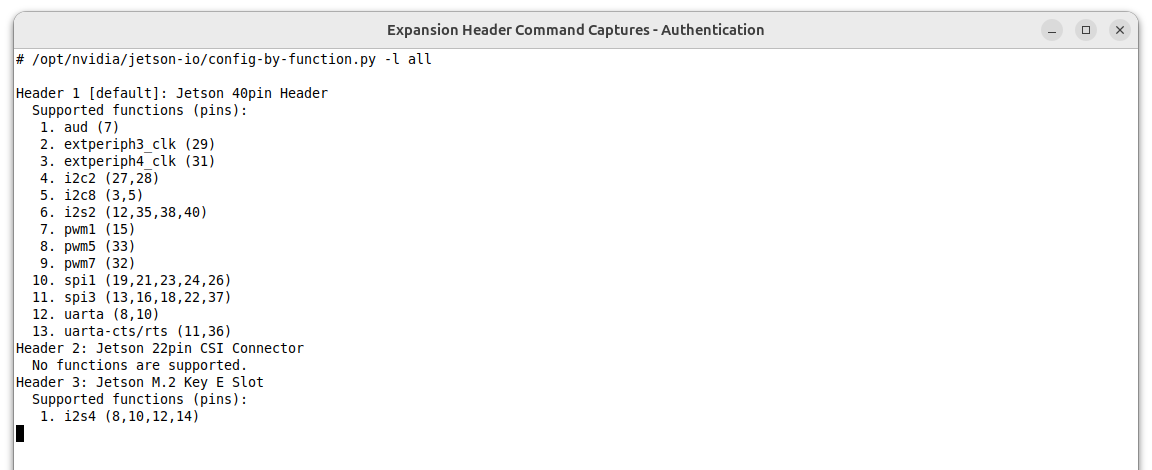
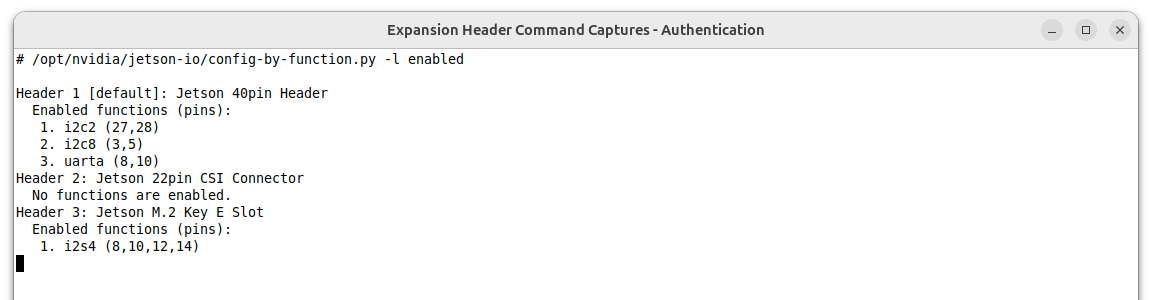
# List all configurable functions / currently enabled functions
sudo /opt/nvidia/jetson-io/config-by-function.py -l all
sudo /opt/nvidia/jetson-io/config-by-function.py -l enabled

# Enable a function and generate a new DTB (added to boot entries)
sudo /opt/nvidia/jetson-io/config-by-function.py -o dt spi1

# Enable multiple functions at once
sudo /opt/nvidia/jetson-io/config-by-function.py -o dt 1="i2s2 spi1"

# Export a DTBO overlay only (boot entries untouched)
sudo /opt/nvidia/jetson-io/config-by-function.py -o dtbo spi1
Examples showing all configurable functions and the currently enabled functions:
Configure by hardware module: config-by-hardware.py
# List preset hardware module configurations
sudo /opt/nvidia/jetson-io/config-by-hardware.py -l

# Apply a module configuration (module name from the official docs as an example)
sudo /opt/nvidia/jetson-io/config-by-hardware.py -n "Adafruit SPH0645LM4H"
Two limitations (per NVIDIA docs)
config-by-hardware.pyandconfig-by-function.pycannot be mixed in a single configuration pass; usejetson-io.pyif you need both.- After a reboot, hardware module selections from the previous session are not retained by Jetson-IO and must be re-selected.
Using Pins in GPIO Mode
Once a pin is configured as GPIO, drive it with gpiod (the sysfs GPIO interface was removed in JetPack 6):
sudo apt install gpiod

# Show all GPIO names and states
gpioinfo

# Operate by name, e.g. PQ.06 (pin 31)
gpioset $(gpiofind "PQ.06")=1   # drive high
gpioget $(gpiofind "PQ.06")     # read input
For more GPIO usage via CLI / Python / C, see GPIO Control; for register-level operations see JetPack 6 GPIO Configuration.
Carrier Board Compatibility
- C1901 / C1902: share the same 40-pin pinout and Jetson-IO workflow; both work out of the box after flashing the official Developer Kit firmware. C1901 V1.3 fixes pins 12/35/38/40, which are unavailable on earlier hardware revisions.
- C2401: no standard 40-pin header; expansion goes through the 30-pin socket — see the product page for the pinout.
- Jetson-IO modifies the DTB and
extlinux.confunder/boot/; after reflashing or replacing the DTB (e.g. USB device tree replacement), the configuration must be redone. - Production advice: Jetson-IO is meant for development. For production images, generate the configuration from the official pinmux spreadsheet and flash it with the firmware — see NVIDIA Pinmux and GPIO Configuration.
For the complete spreadsheet, BCT, DTS/DTB/DTBO, validation, and recovery workflow, see Pinmux & Device Tree.