
Flash the C1902
This guide explains how to flash the system onto the C1902 carrier board. C1902 is developed from the reference design and is fully compatible with the Developer Kit firmware.
Before You Start
- Ubuntu VM and SDK Manager installed (see the installation guide)
- A USB Type-C cable capable of data transfer
- C1902 carrier board + Jetson Orin Nano/NX module
1. Enter Recovery Mode
The C1902 enters recovery mode through the 12-pin debug header.
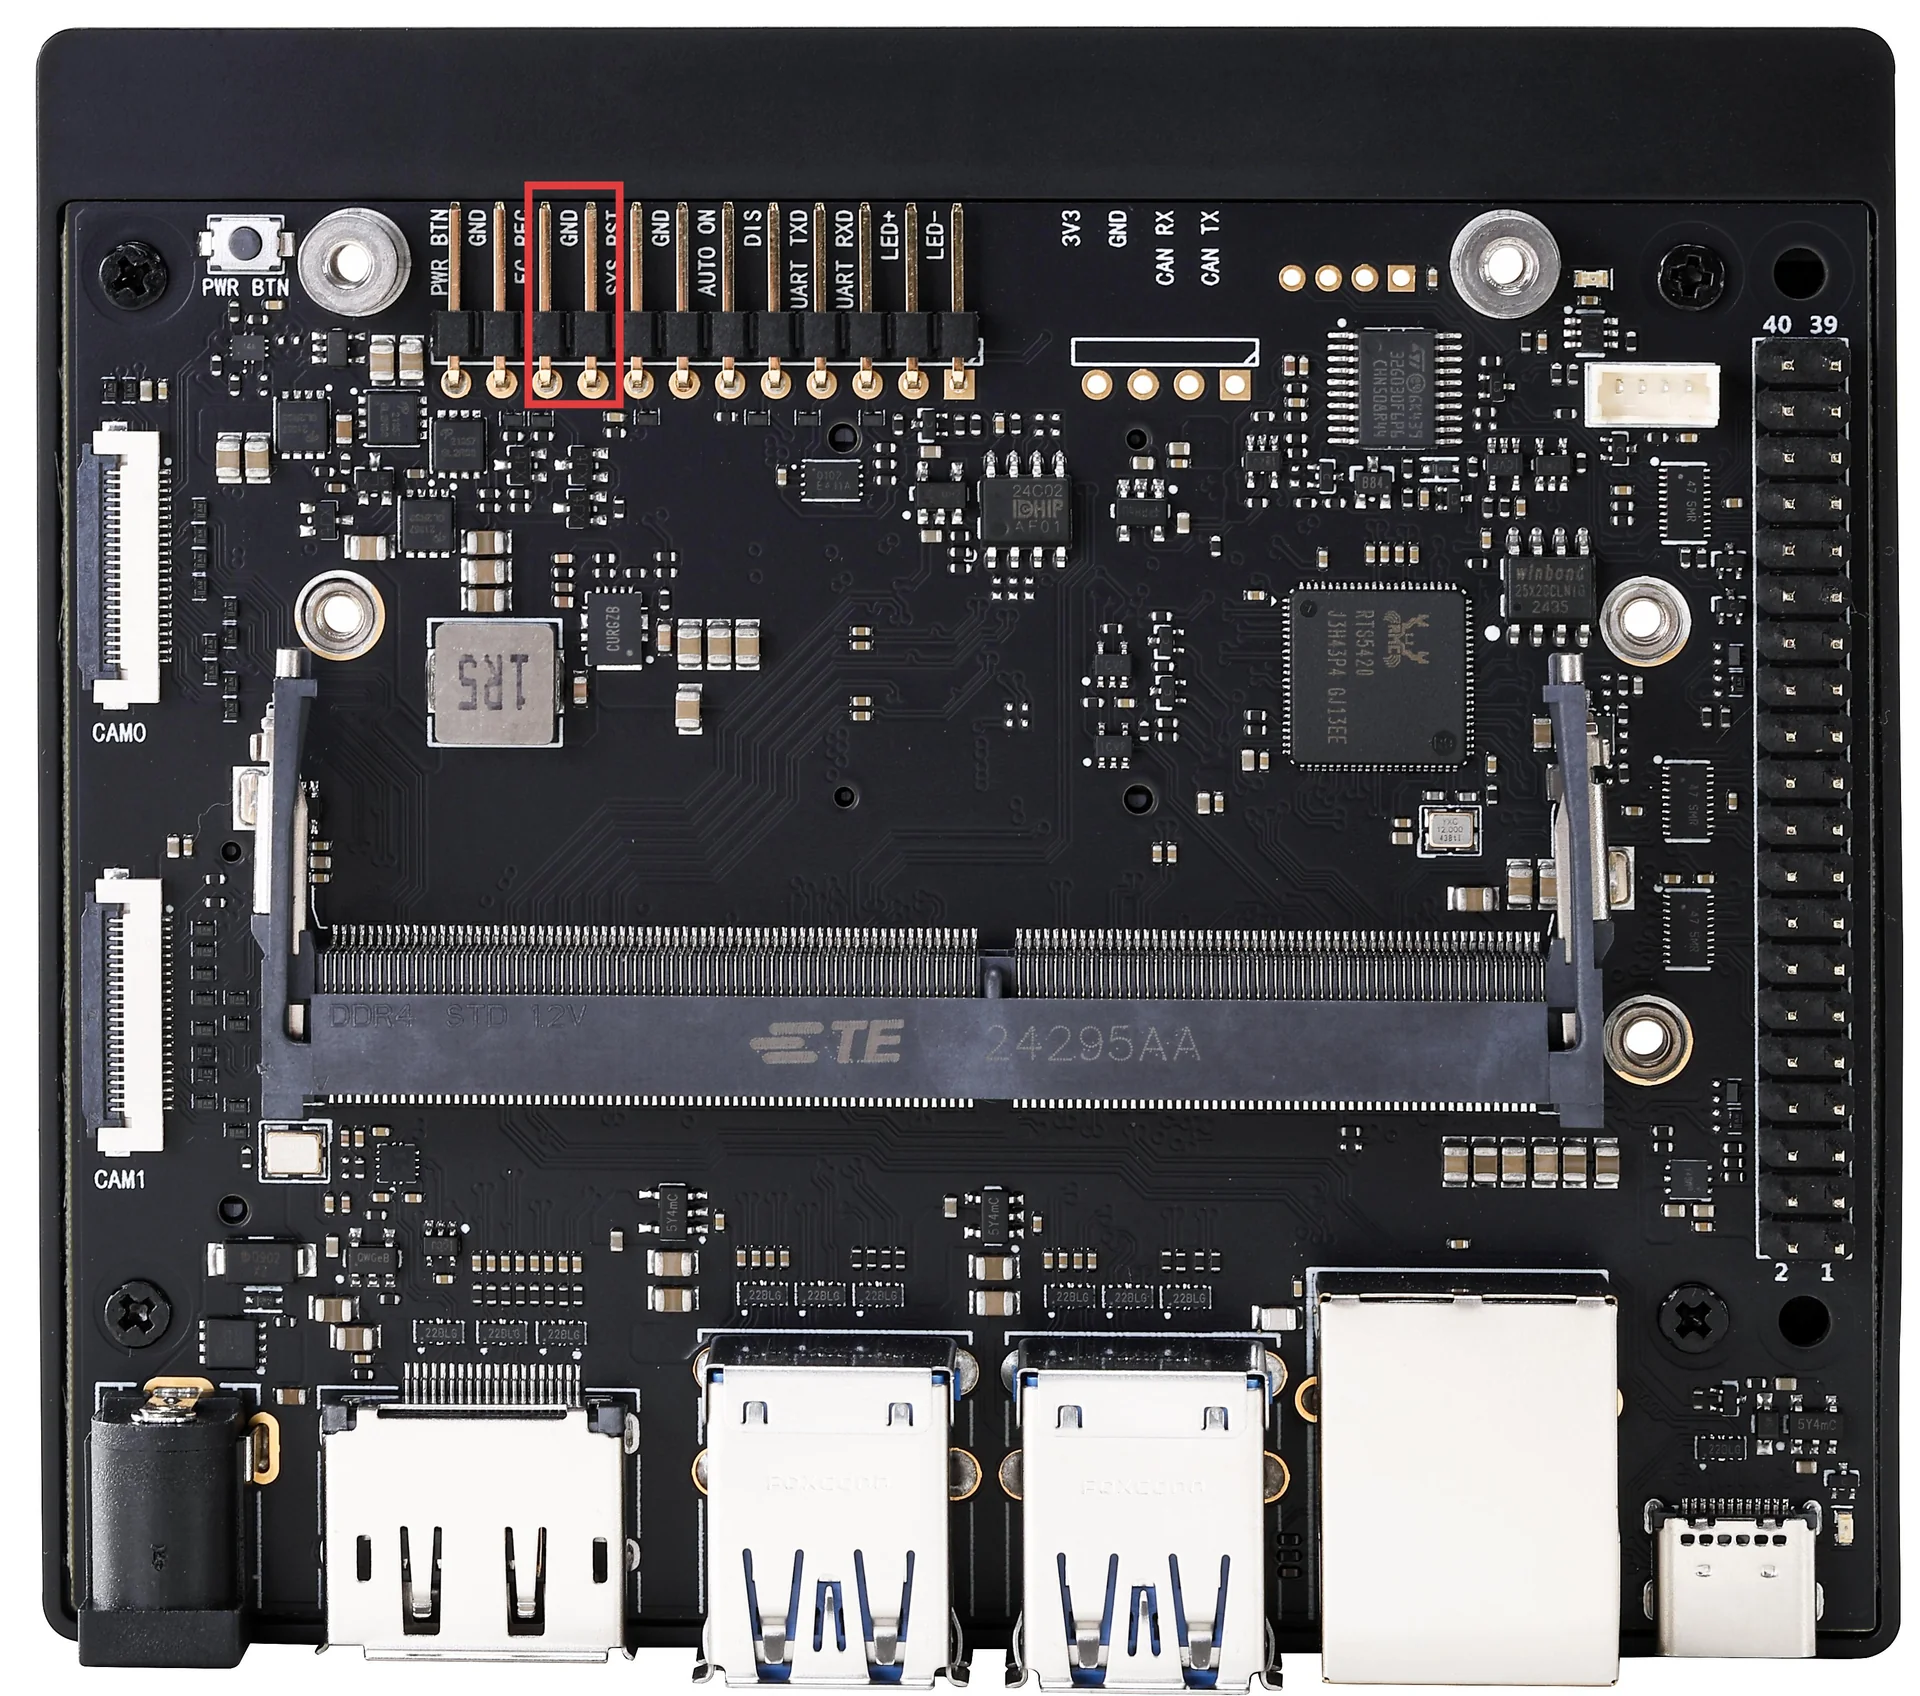
Steps:
- Disconnect the C1902 power.
- Use a jumper cap to short the FC REC and GND pins.
- Connect the power.
- Connect the C1902 to the VM with a USB Type-C cable.
- Remove the jumper cap.
2. Detect the Device
Run in the Ubuntu terminal:
lsusb | grep -i nvidia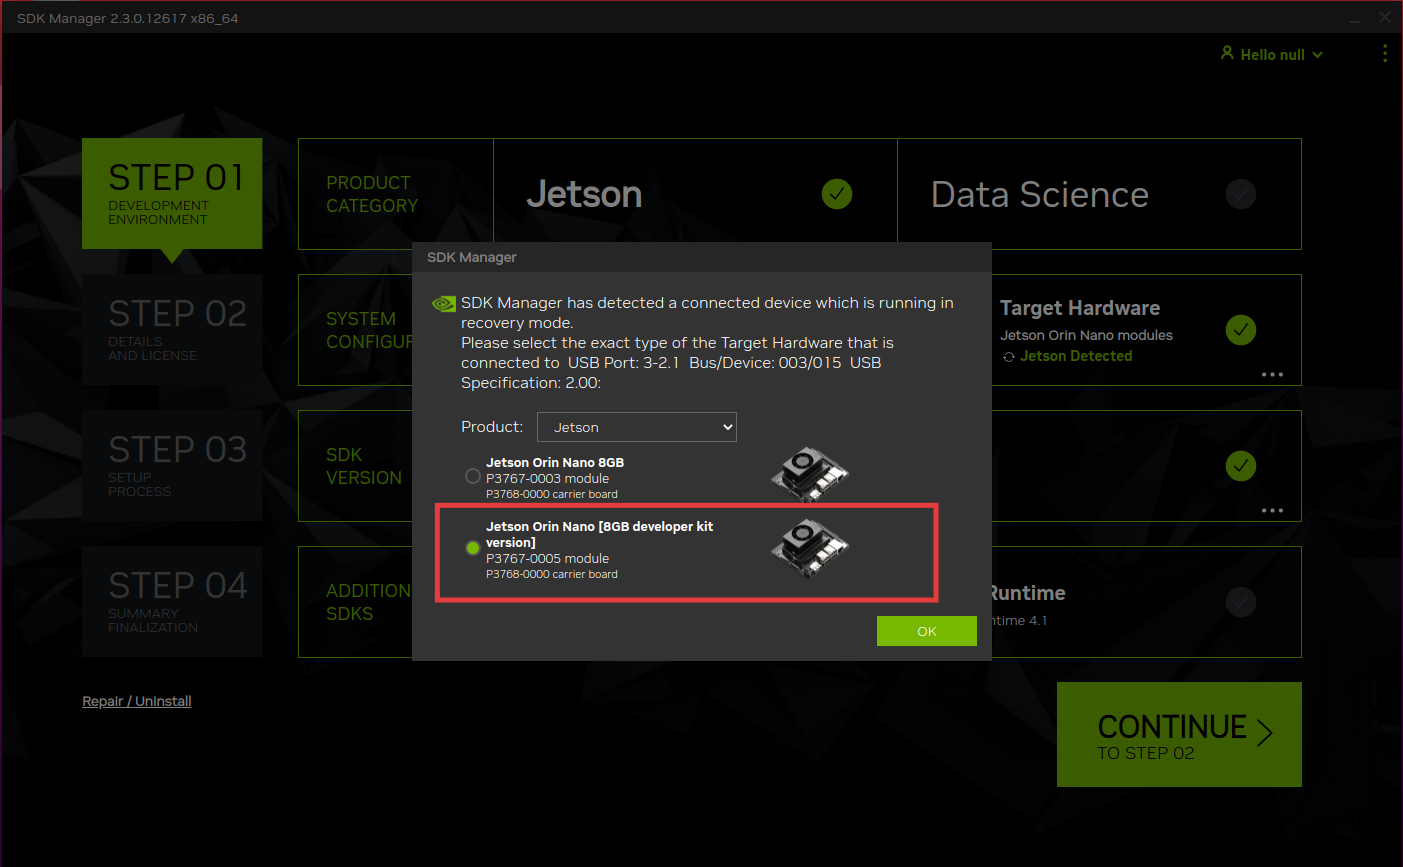
If an NVIDIA device is detected, recovery mode was entered successfully.
3. Flash with SDK Manager
Open SDK Manager and select the corresponding module model (Orin Nano or Orin NX).
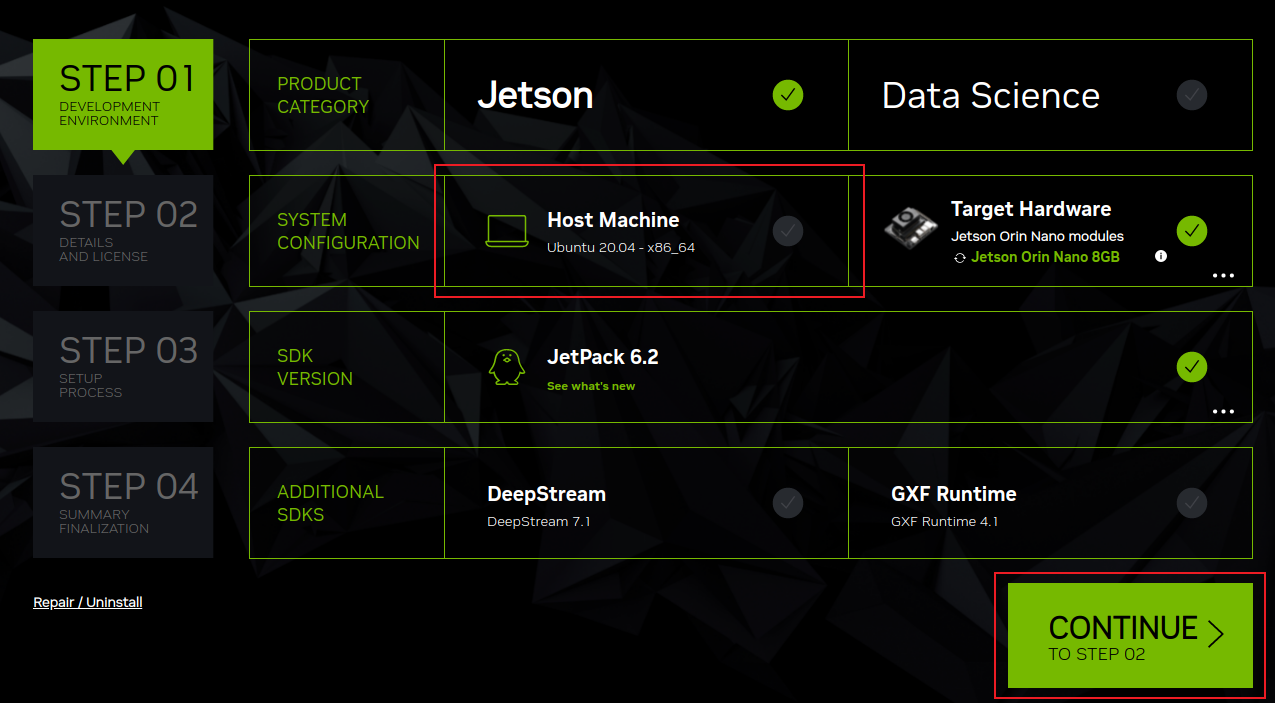
Note
The C1902 is fully compatible with the Developer Kit firmware and can be flashed directly with the official JetPack.
Uncheck Host Machine and keep only Target Hardware.
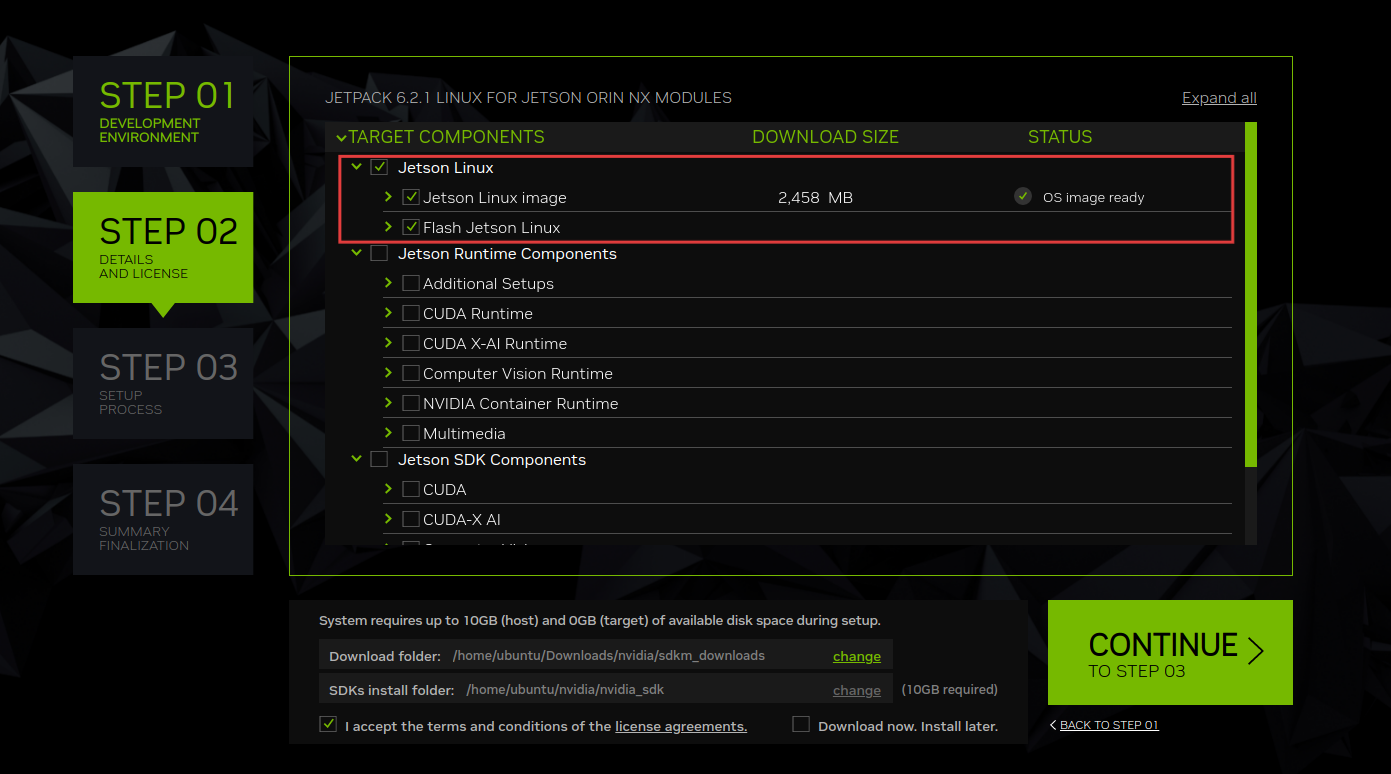
After selecting the JetPack version, start the flashing flow.
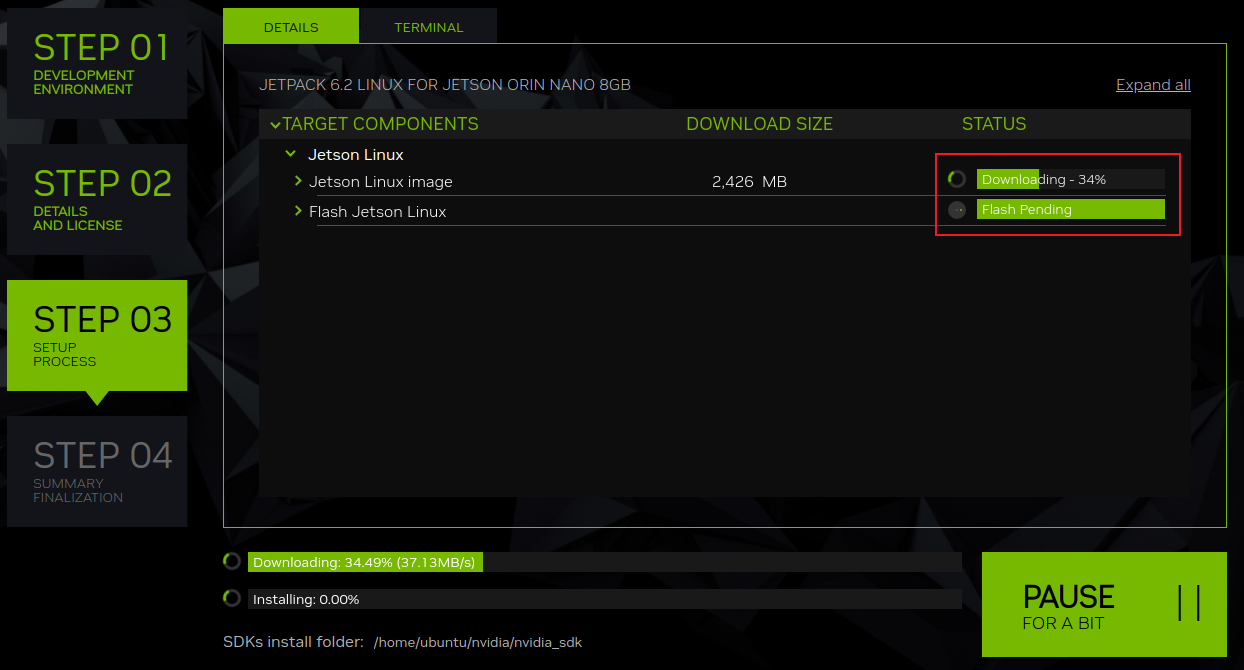
In the flashing configuration window, select the storage medium and system version.
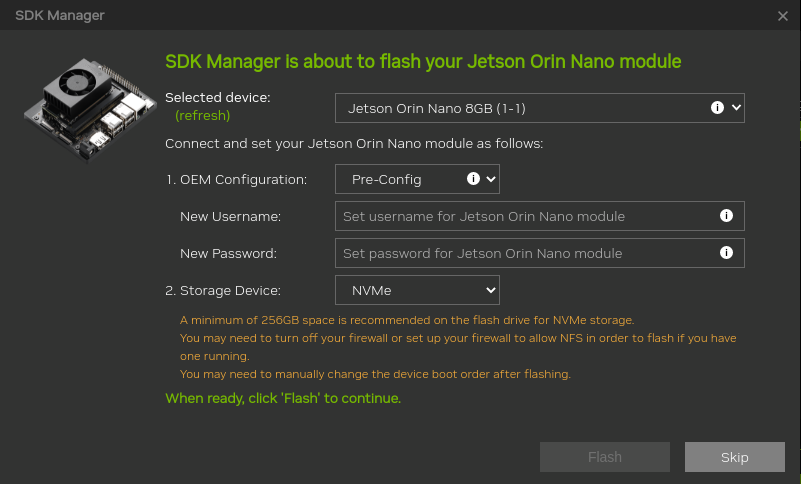
Click Flash to start and wait for it to finish.
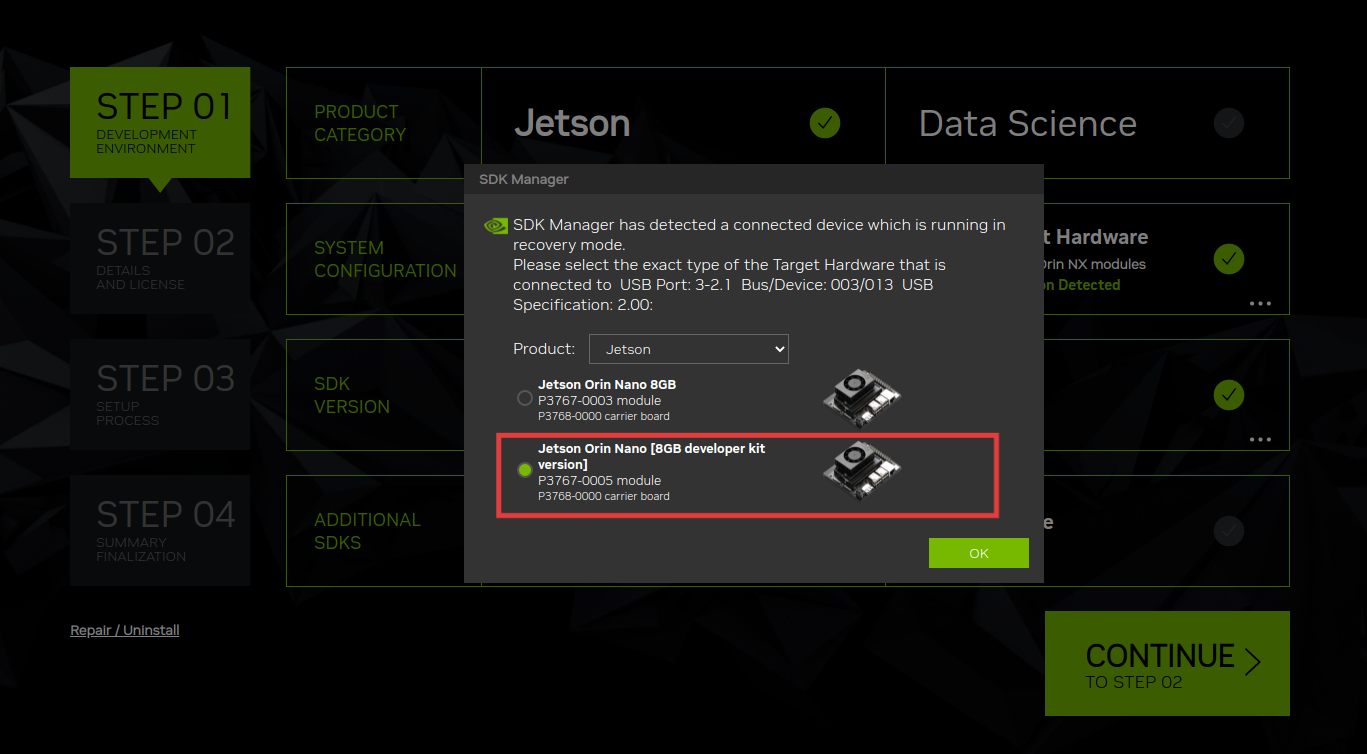
4. Finish
After flashing, the C1902 reboots automatically into the system. The first boot requires initial system configuration.
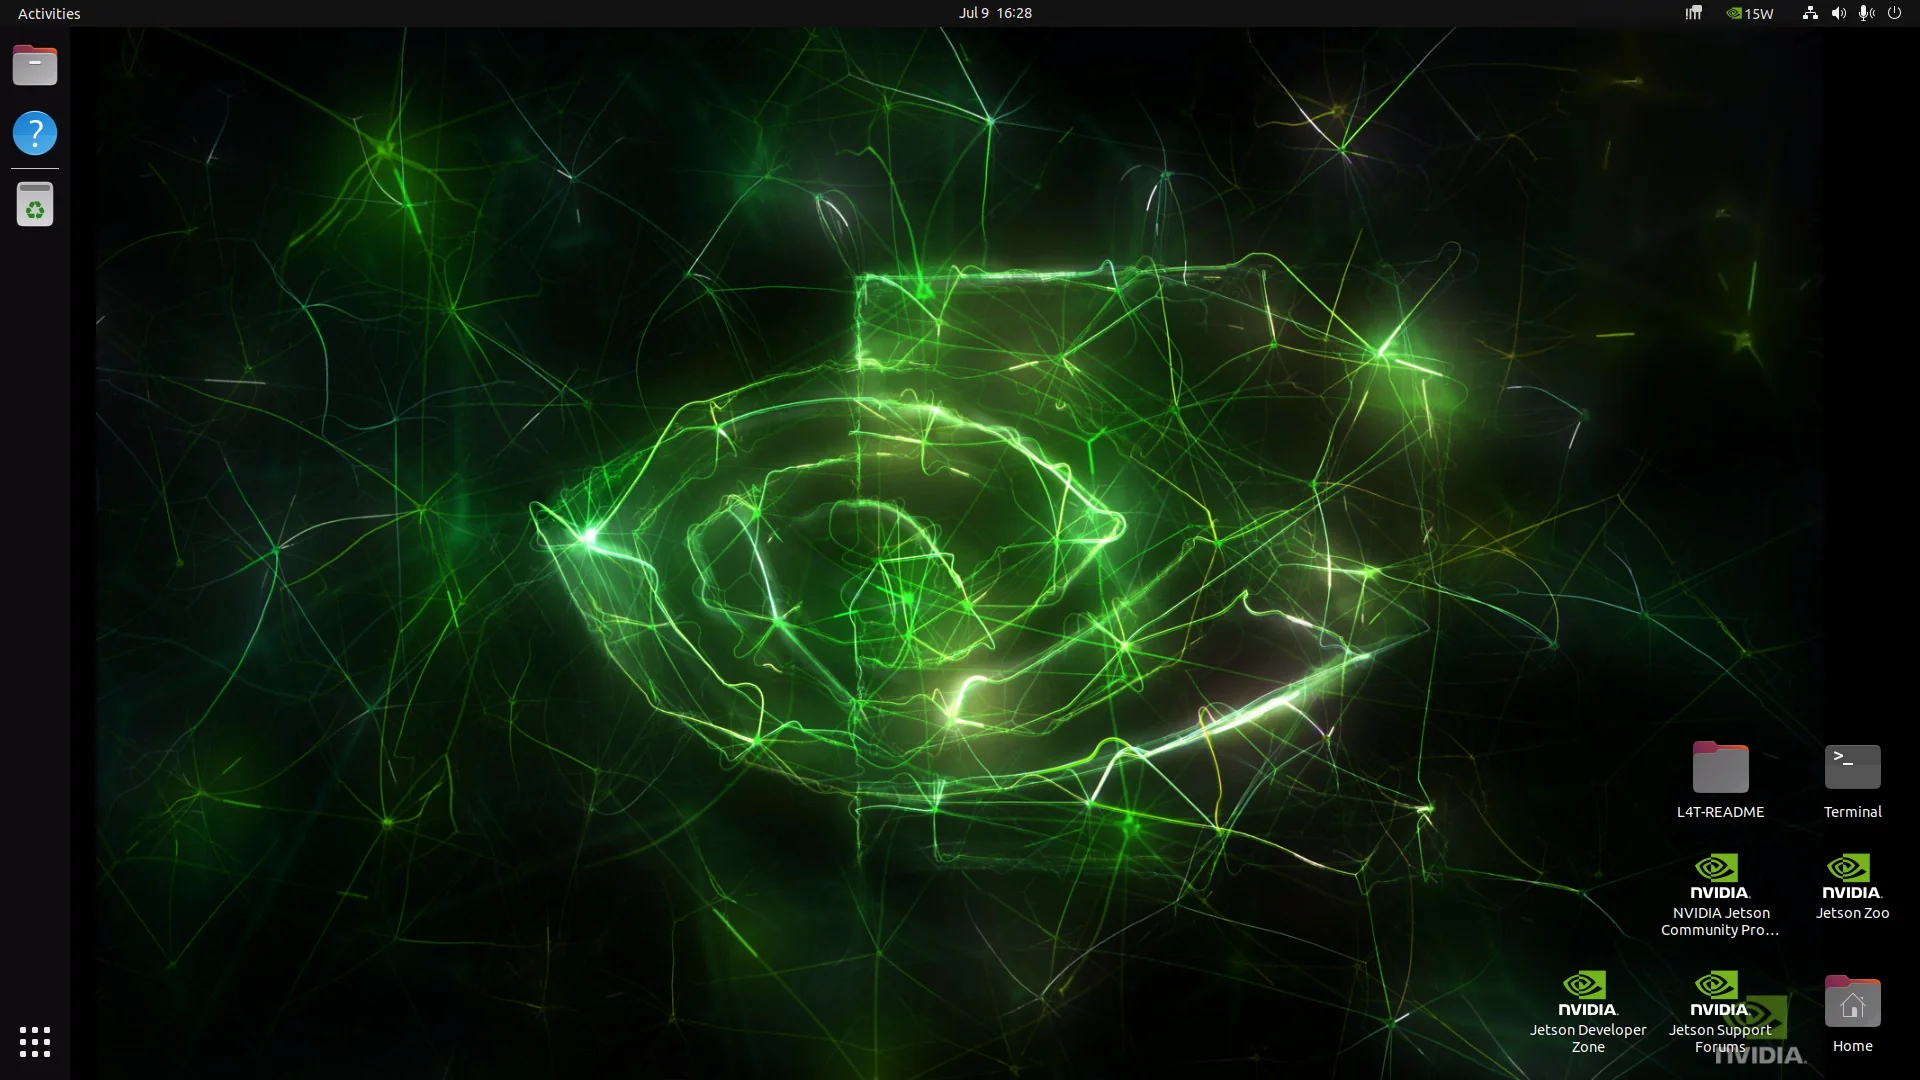
First Boot Configuration
- Select language, time zone, and keyboard layout
- Set a username and password
- Once done, you reach the Ubuntu desktop
Troubleshooting
Cannot Enter Recovery Mode
- Confirm the FC REC and GND pins are shorted correctly
- Confirm the power supply is working
- Check that the USB Type-C cable is a data cable
SDK Manager Cannot Detect the Device
- In VMware, confirm the USB device is connected to the VM
- Run lsusb to confirm the device is detected
- Try a different USB port
Flashing Failed
- Ensure enough disk space
- Keep the USB connection stable during flashing
- Re-enter recovery mode and retry